Pediatric arch support
A sewn arch sleeve with a gel insert, designed by our team for children aged 5 to 7 with flat feet. I researched existing treatments, drew the system diagram, helped with the analysis and drafted the verification matrix. The team built a V2 prototype (beta), a design brief and a verification plan.
- Course
- BME 3050 Medical Device Design, University of Cincinnati, summer 2026
- My part
- Clinical contact, research and system analysis
- Built
- V2 prototype, design brief, verification plan
Pediatric arch support
Our team designed a sleeve with a gel insert to support the arch in children aged 5 to 7 with symptomatic flat feet.
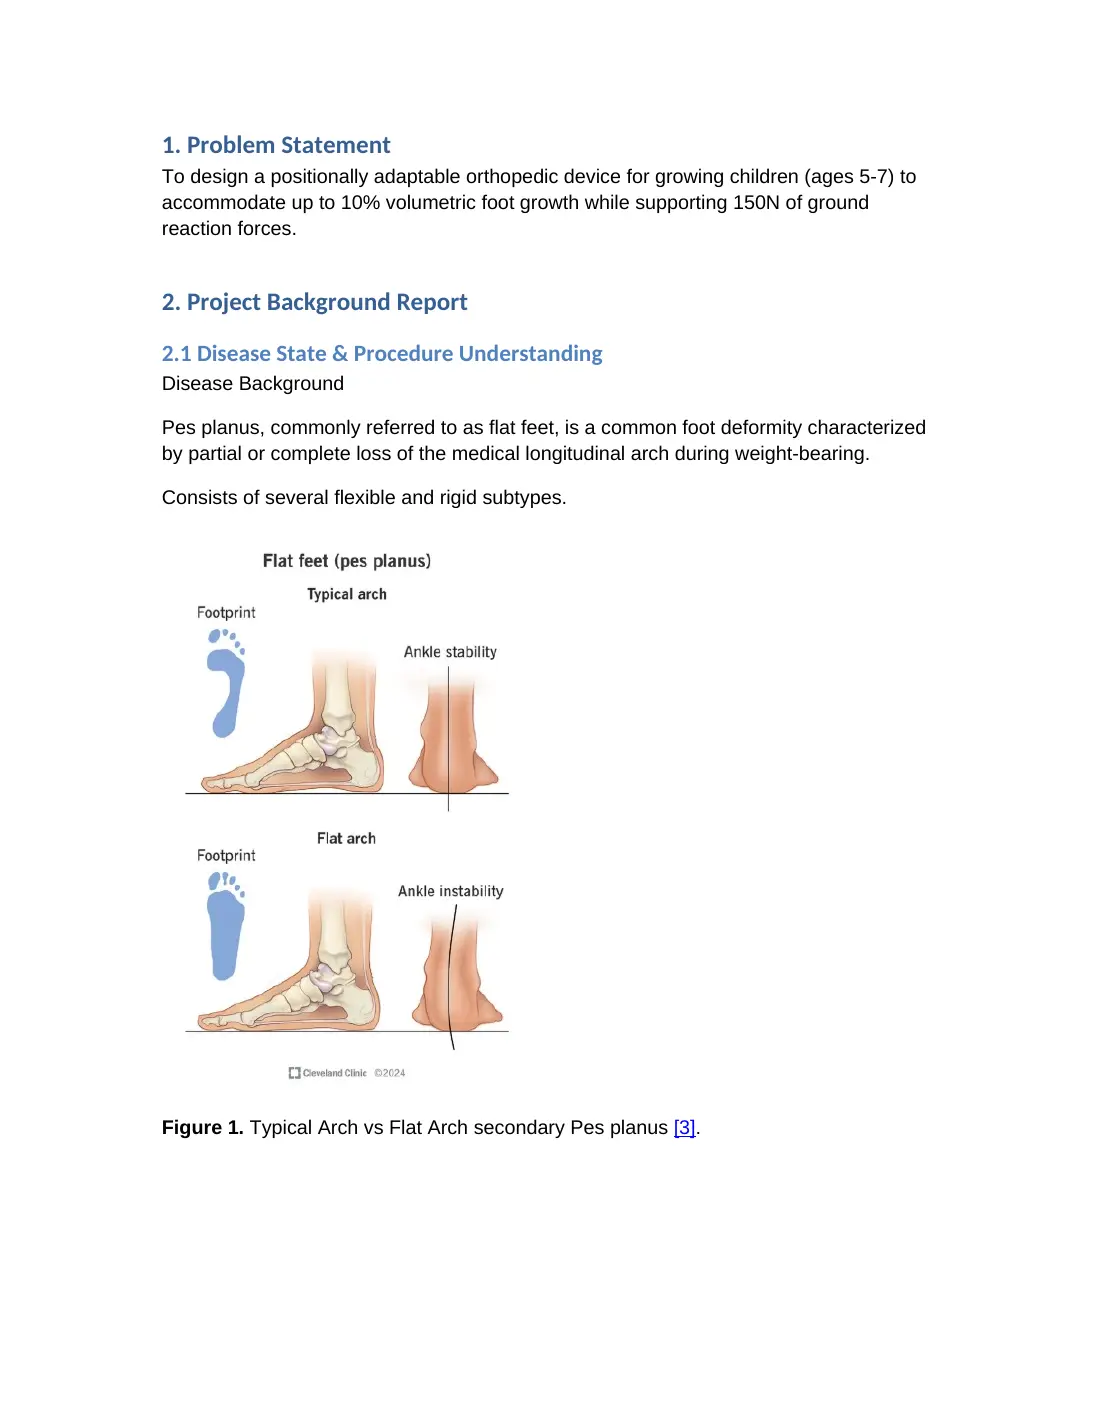
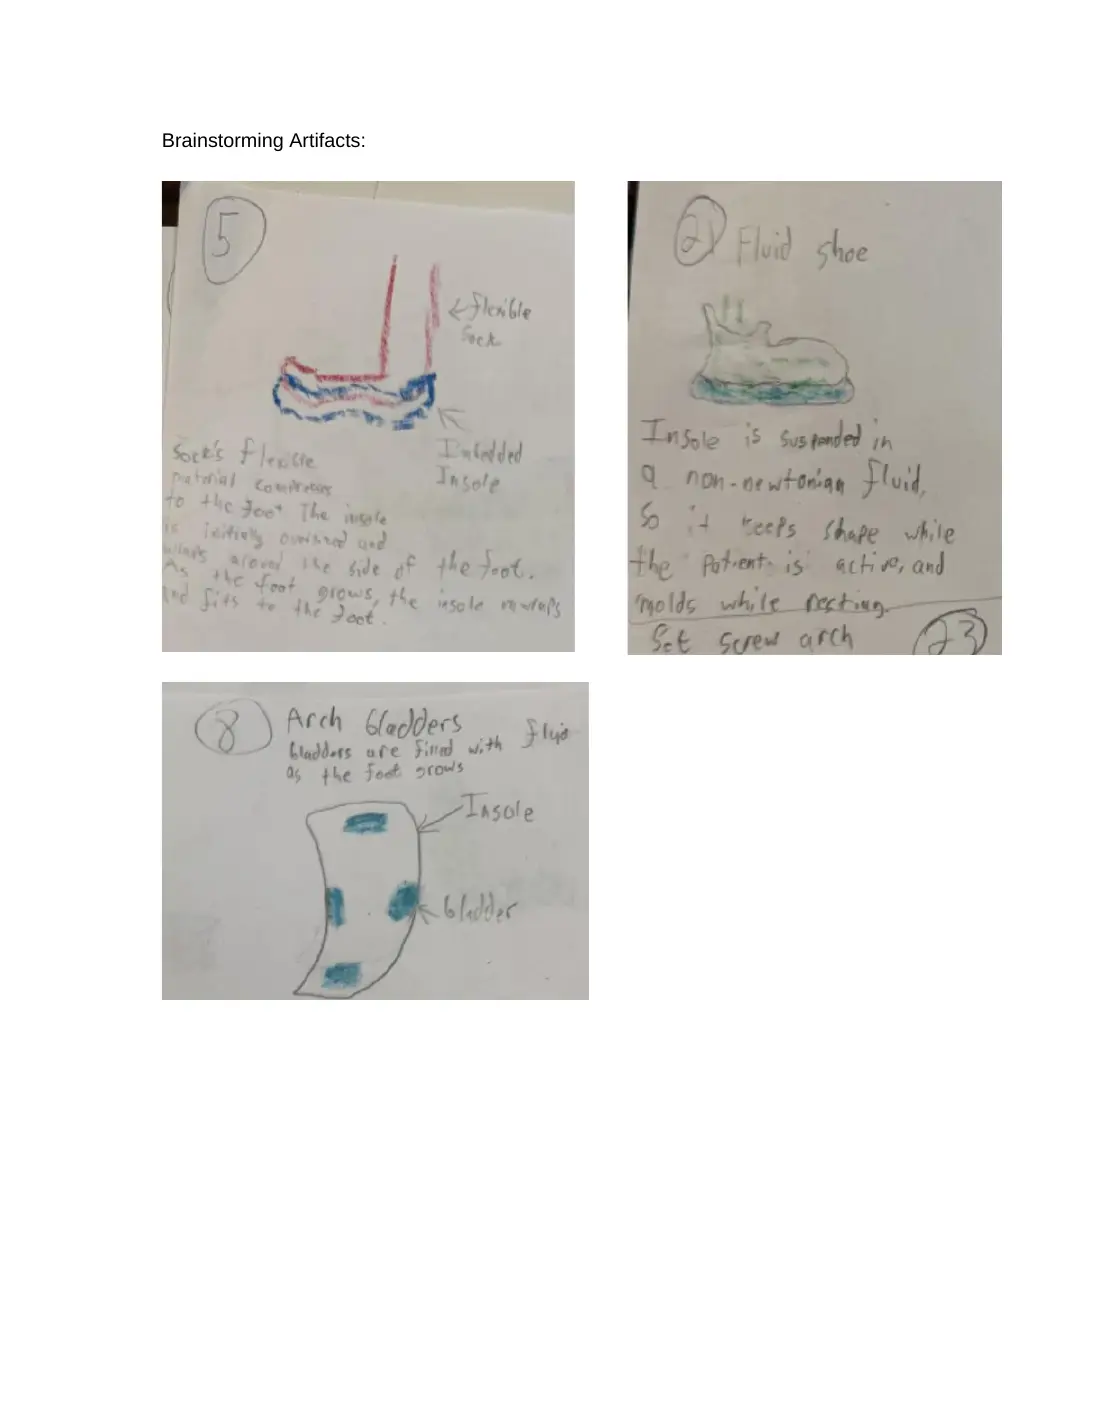
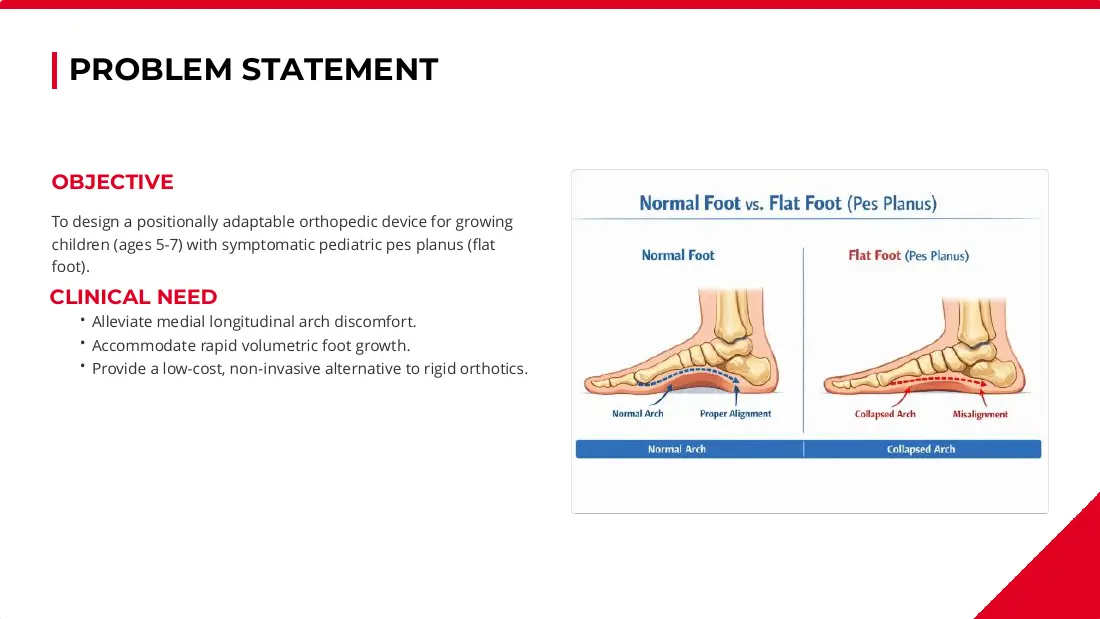
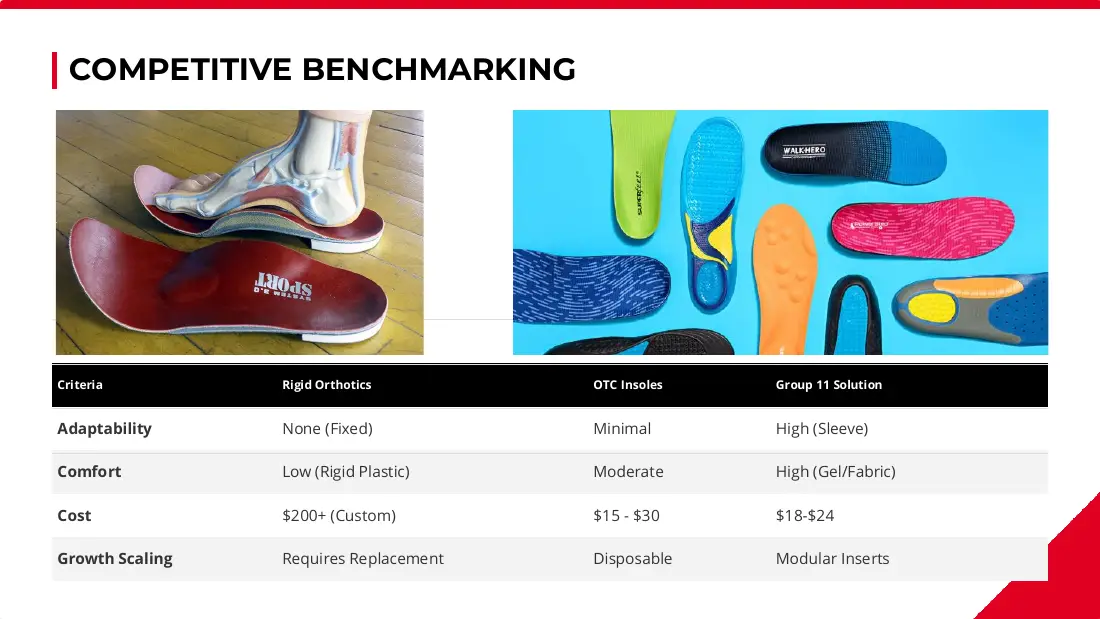
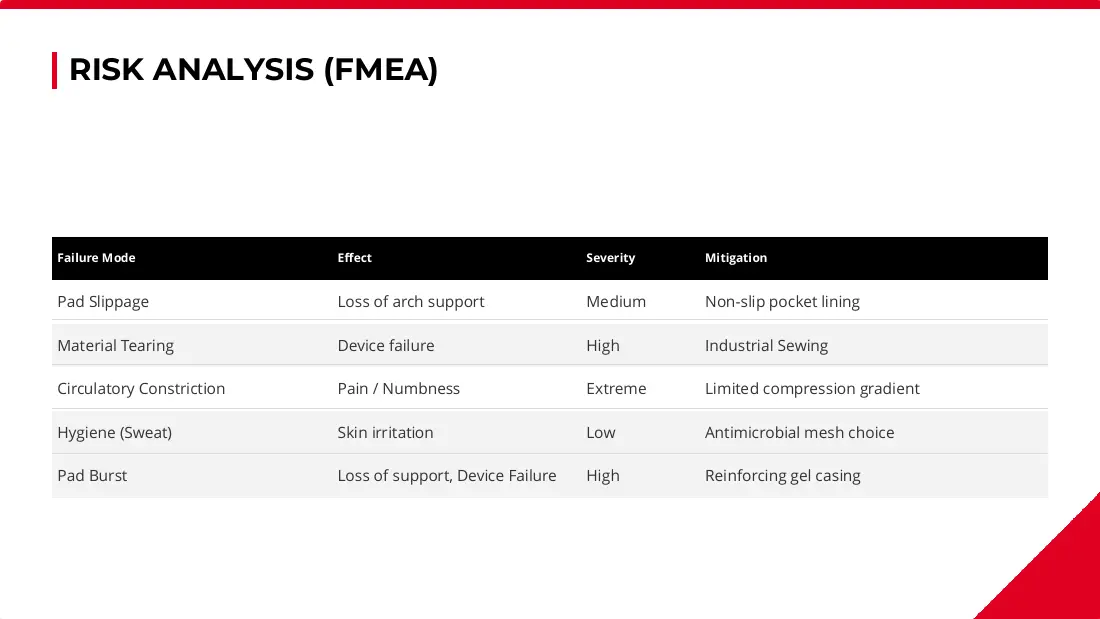
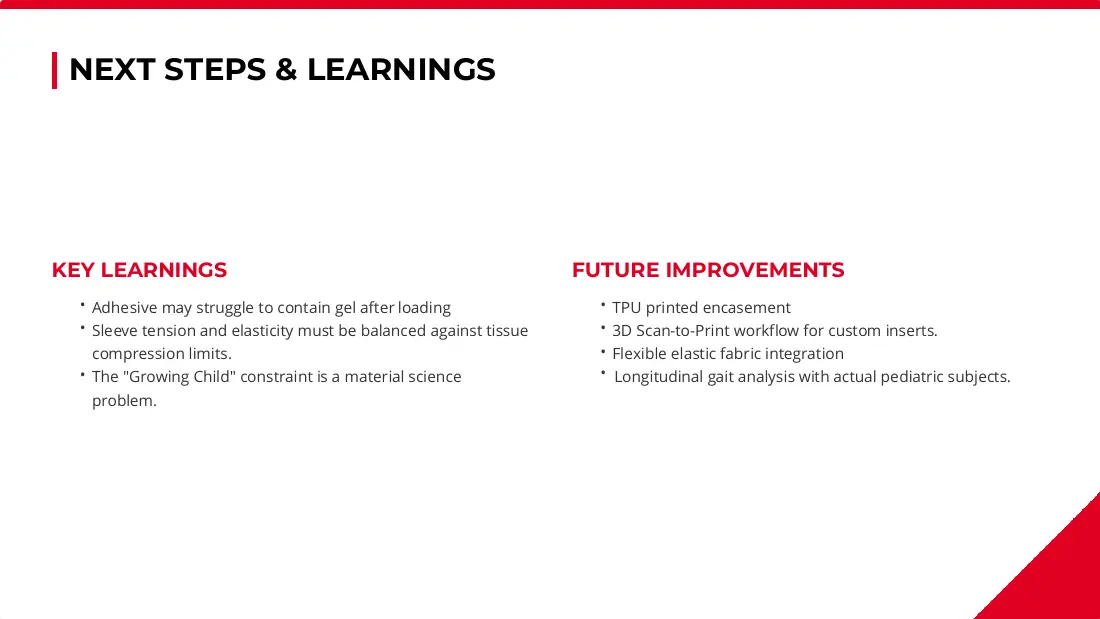
Flat feet are common in young children. For some they hurt: sore feet, ankles and shins. Rigid orthotics are fixed in size and need replacing as the foot grows, so we built a sleeve that pulls on like a sock and holds a gel insert.
Flat arch
Supported arch
How an arch works
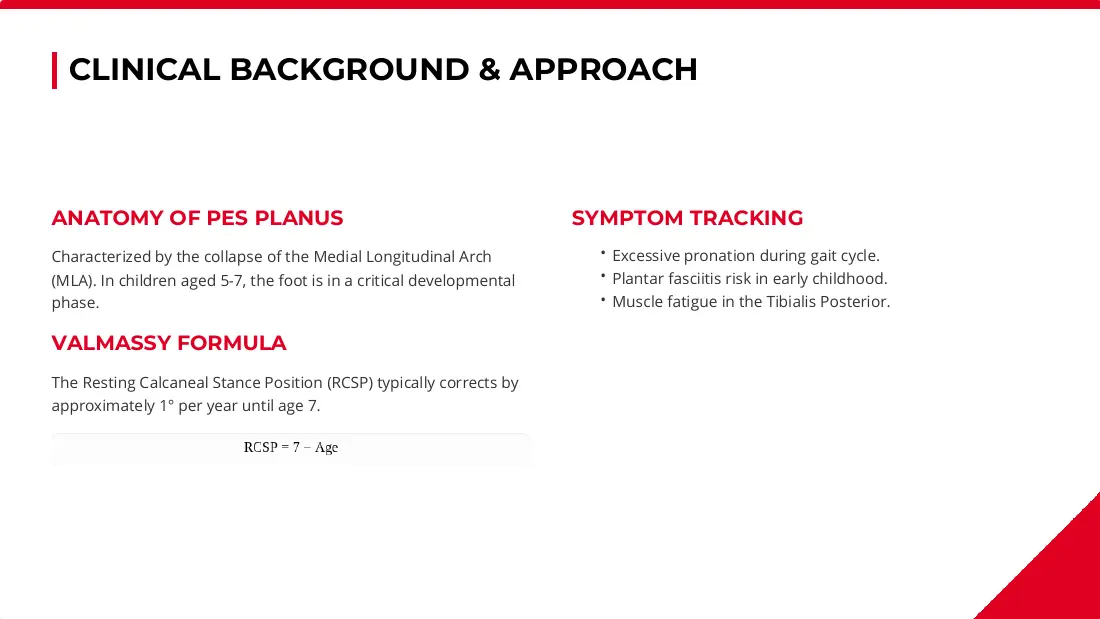
The inner arch of the foot is a bridge. The heel bone, midfoot bones and the first metatarsal form the span, and a band under the foot, the plantar fascia, ties the two ends together. Doctors call it the medial longitudinal arch. In a flat foot the bridge sinks and the whole sole meets the floor.
Scrolling raises the arch. Use the slider to adjust it.
- Calcaneus (heel bone)
- Talus
- Navicular
- Medial cuneiform
- First metatarsal
- Plantar fascia
Supported. The heel, outer edge and ball still print, and the midfoot narrows.
Orange: the insert, drawn as stacked layers under the arch. The pale line under the skin is the plantar fascia.
The arch lowers
In a flat foot, the bridge sinks and the midfoot print widens.
The bridge rises
The heel, midfoot bones and first metatarsal form the span. The plantar fascia ties the heel to the ball.
Space for the insert
The orange layers fill the space beneath the arch. The heel, outer edge and ball still meet the floor.
What we built
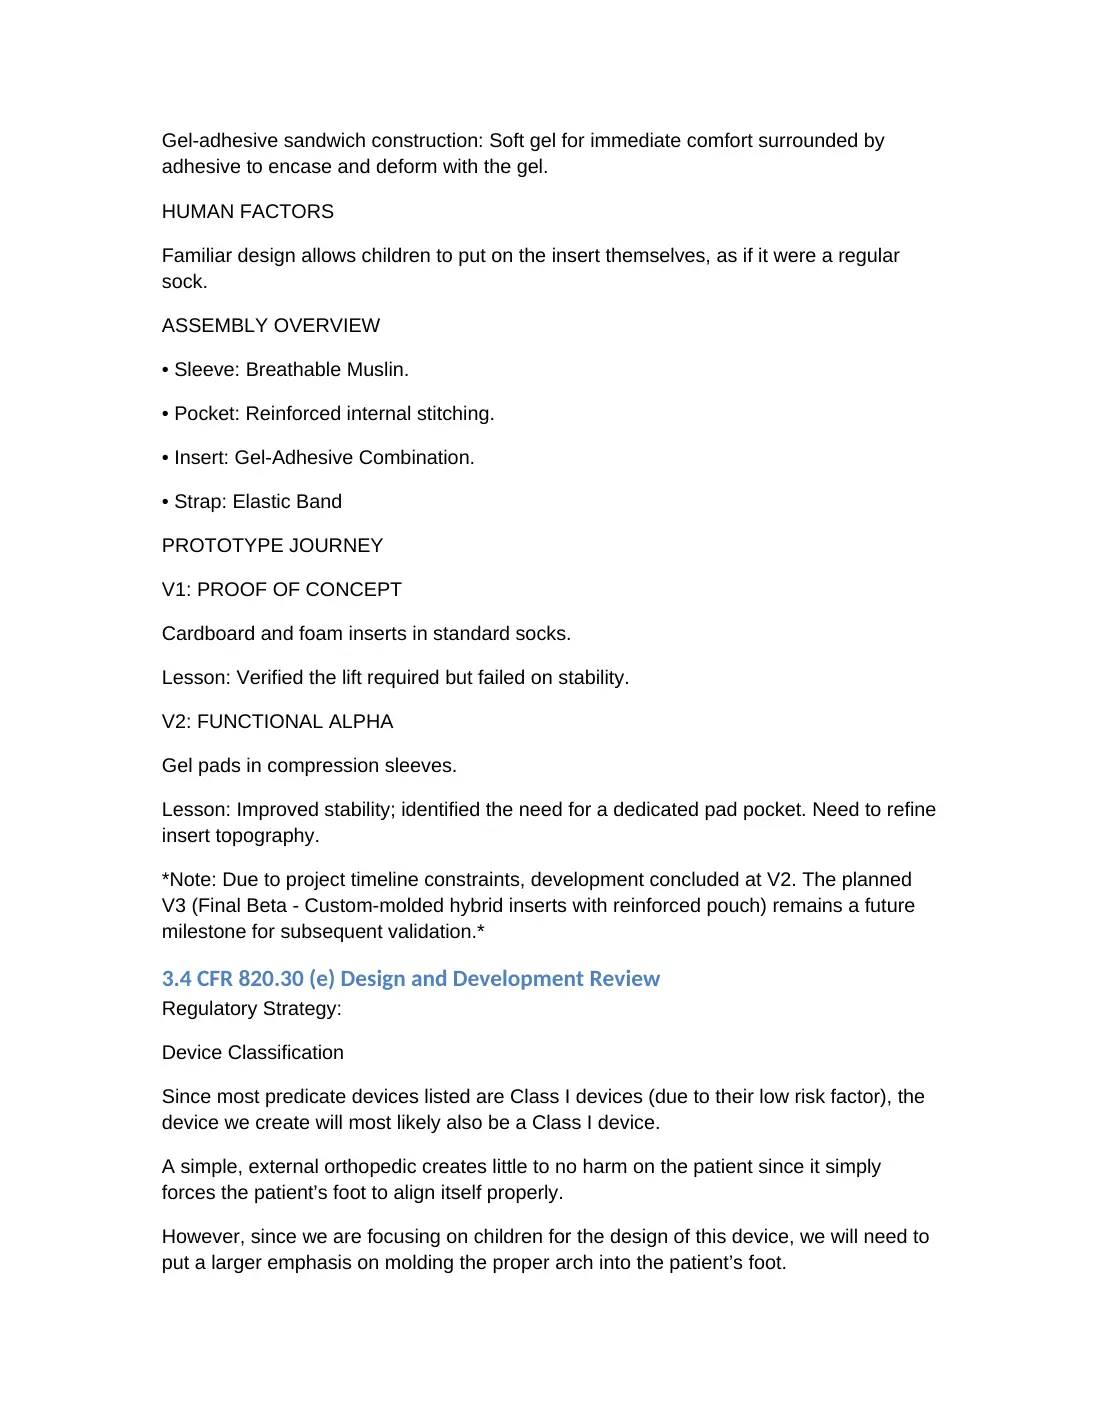
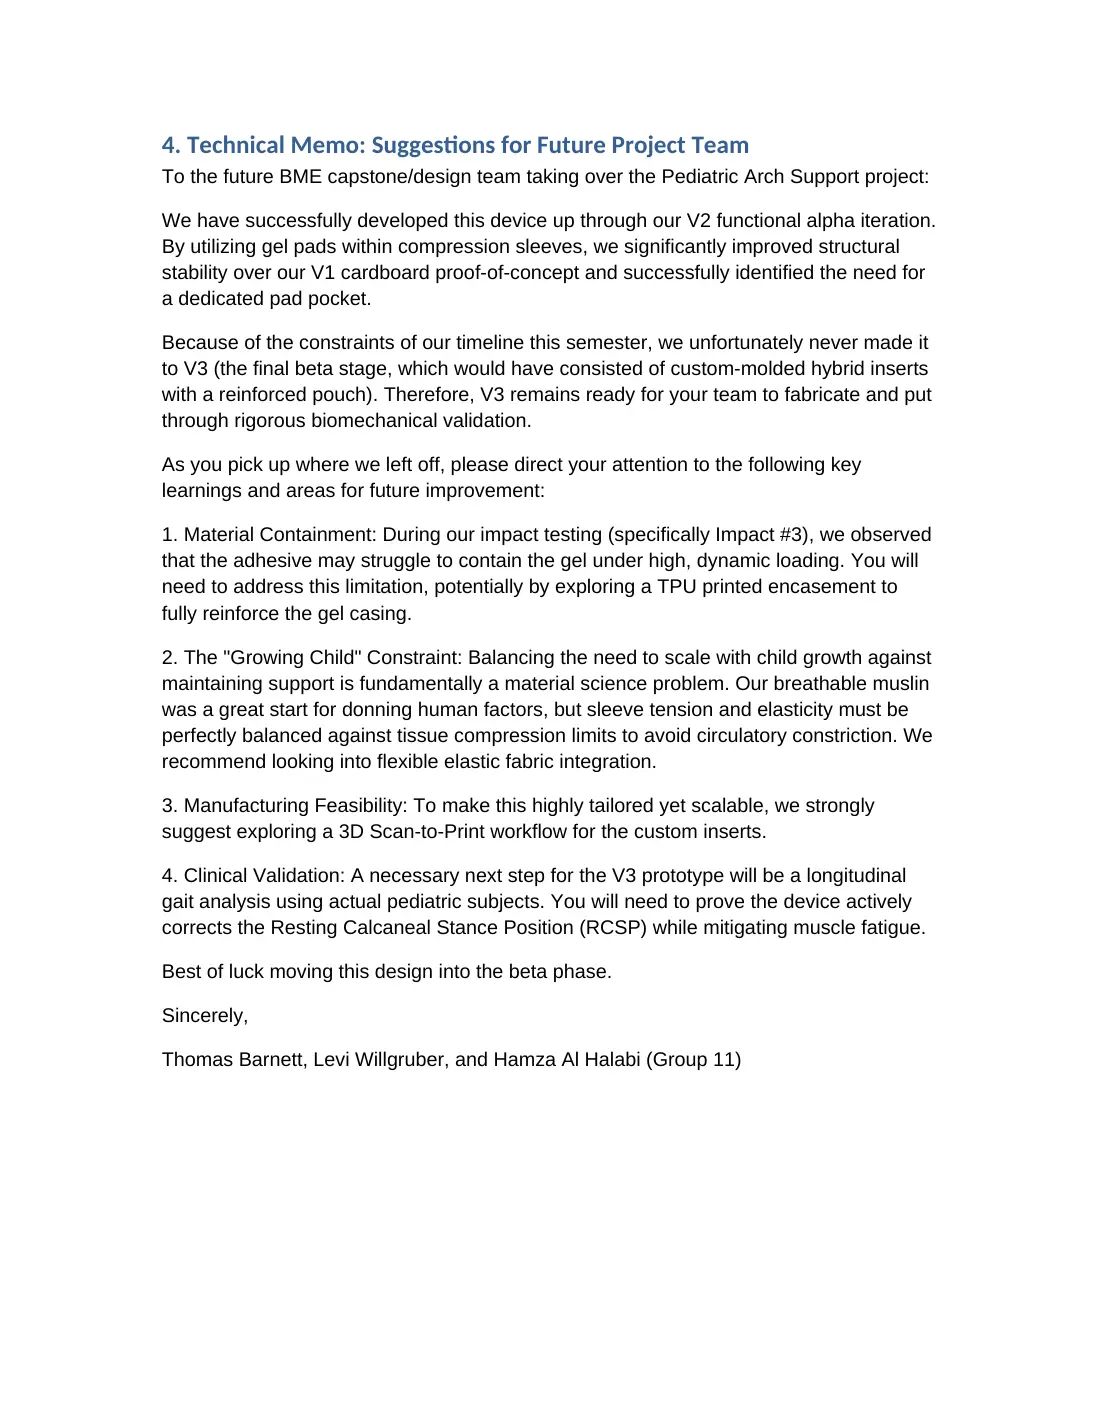
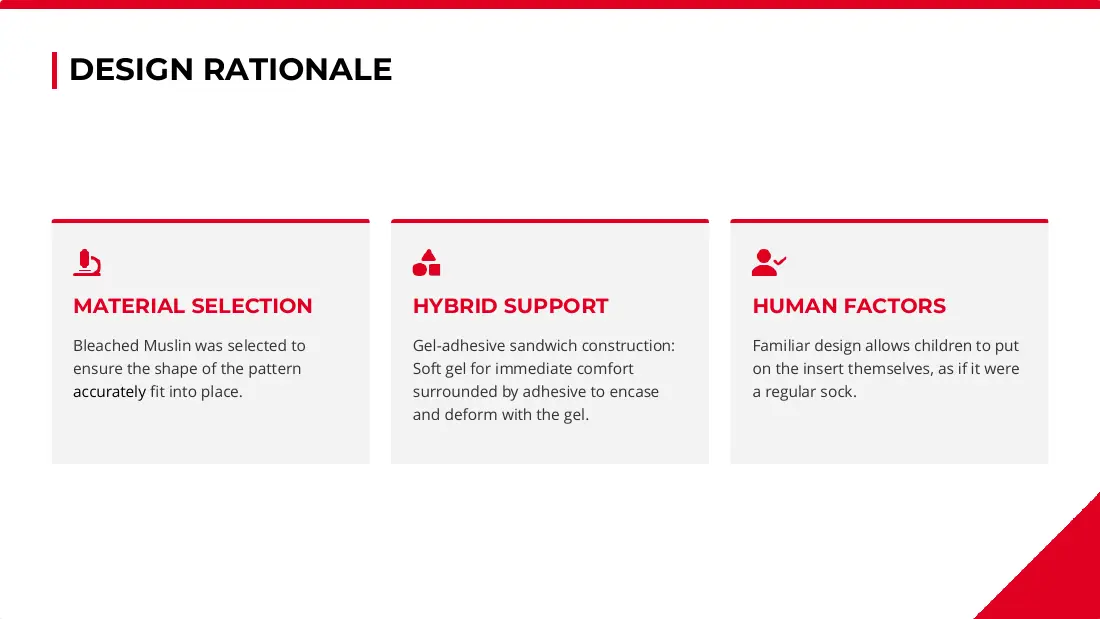
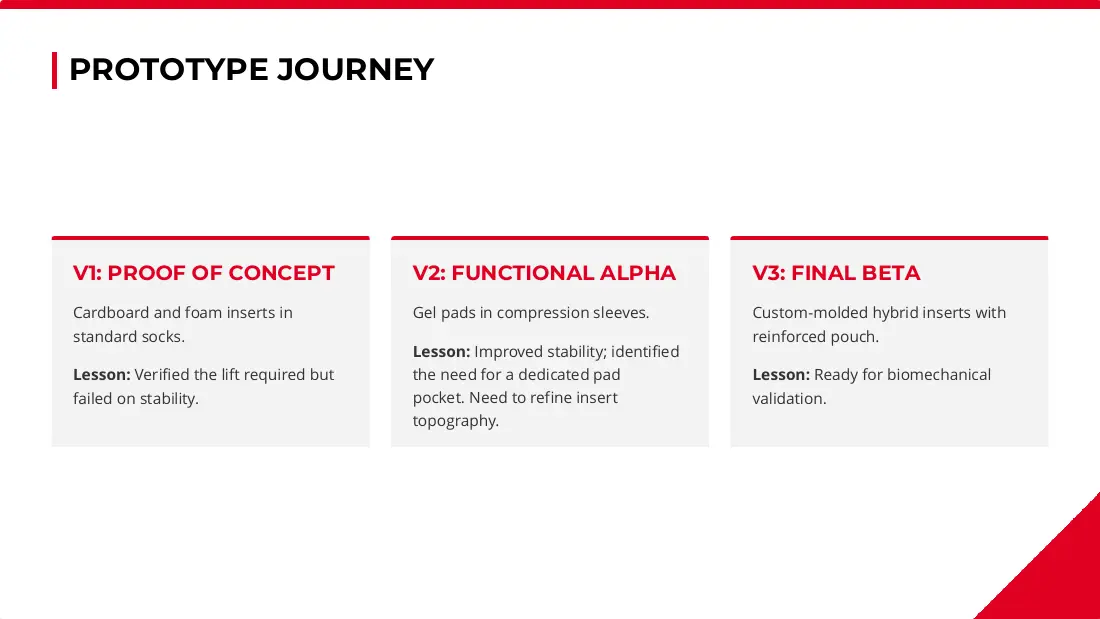
Version 2 (beta) is a sewn sleeve with a pocket and a gel insert. V2 used a gel pad. Version 1, cardboard and foam in a standard sock, gave the lift but was not stable, so we moved to gel pads in compression sleeves.
Scrolling assembles the sleeve. Drag the build slider to inspect a part.
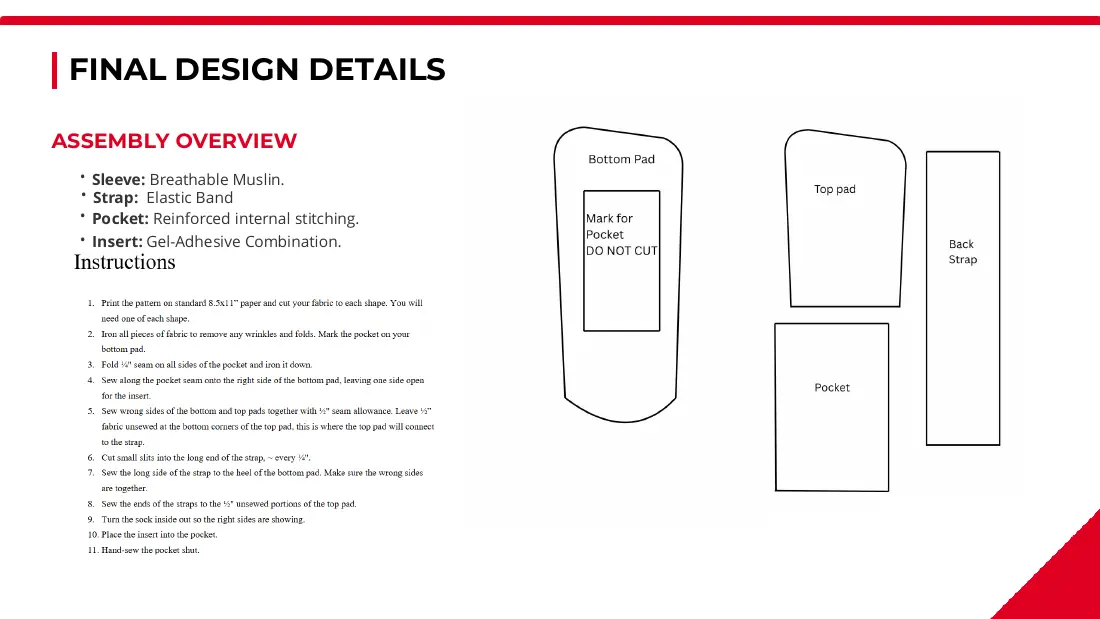
Sleeve
Breathable muslin that pulls over the foot like a sock.
Pocket
Reinforced stitching holds the gel pad under the arch.
Insert
A gel pad with an adhesive layer fills the space under the arch.
Strap
An elastic band at the heel guides placement.
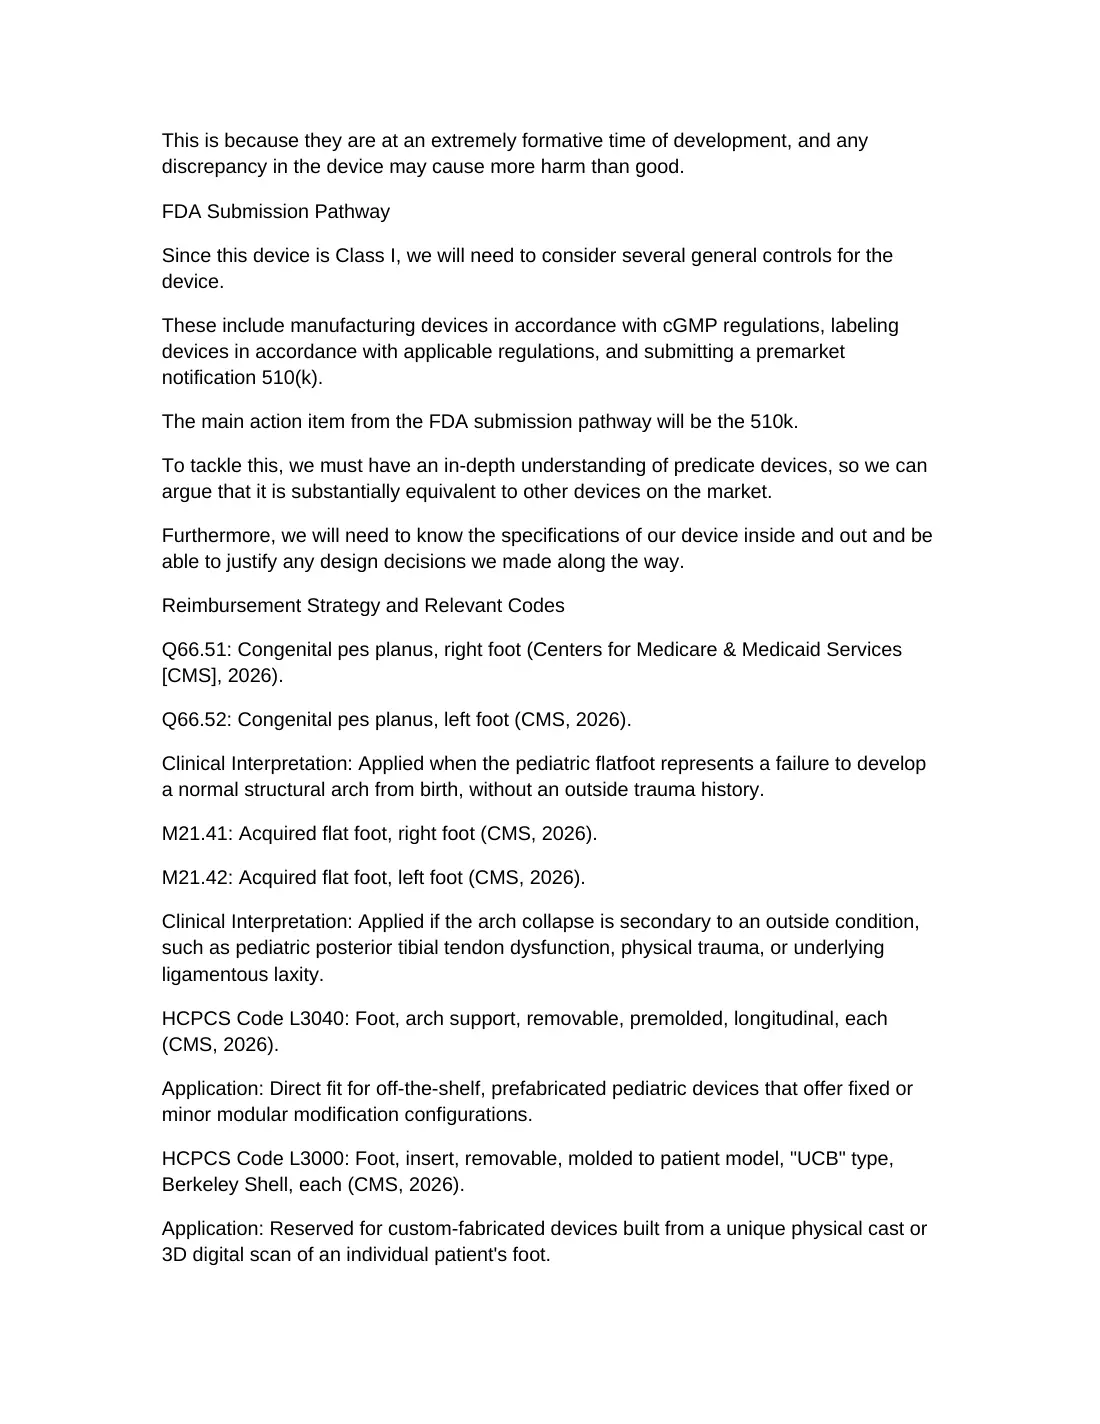
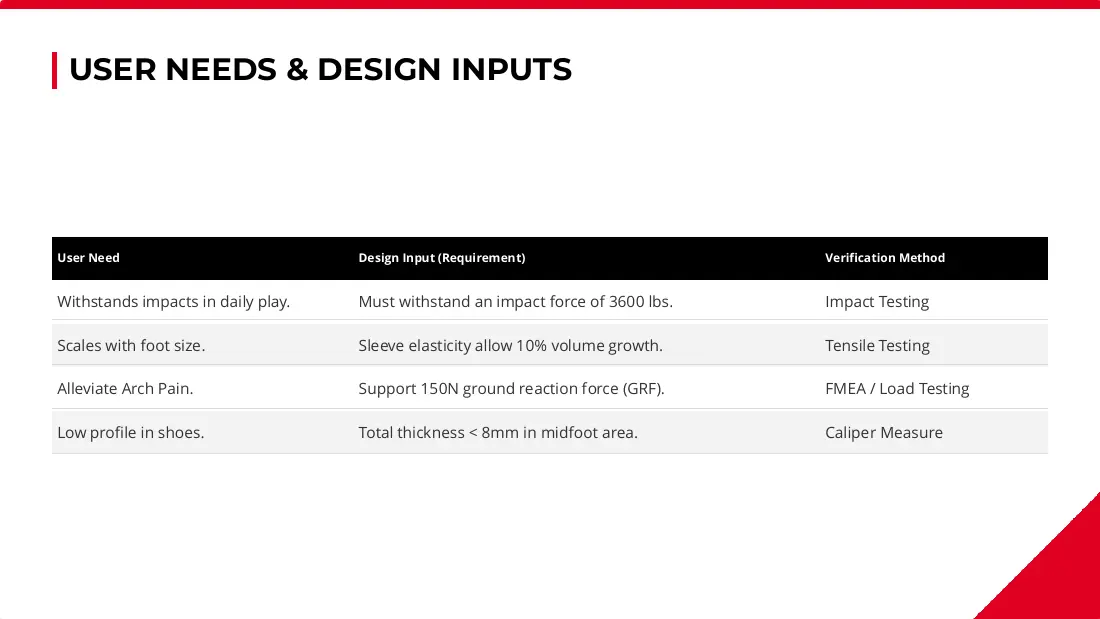
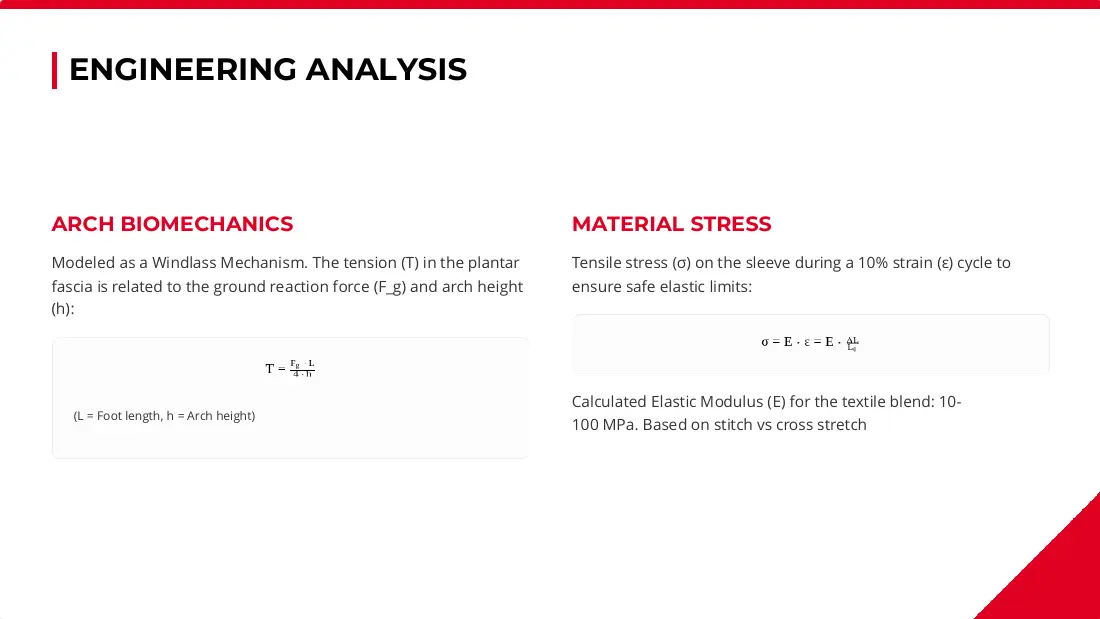
Targets from the brief: room for 10% growth, a 150 N ground-reaction load and a midfoot under 8 mm.
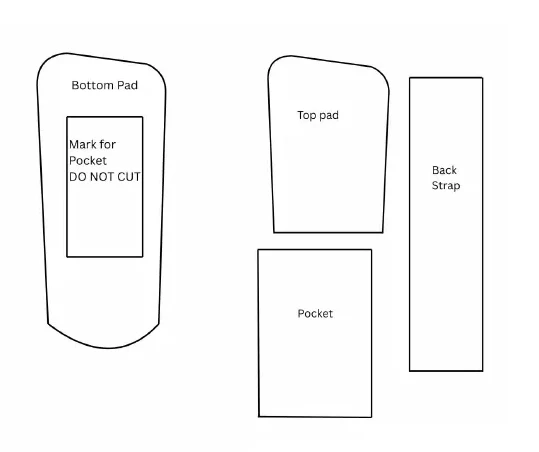
Fig. 1 The four pieces we cut the sleeve from. Design review, page 8 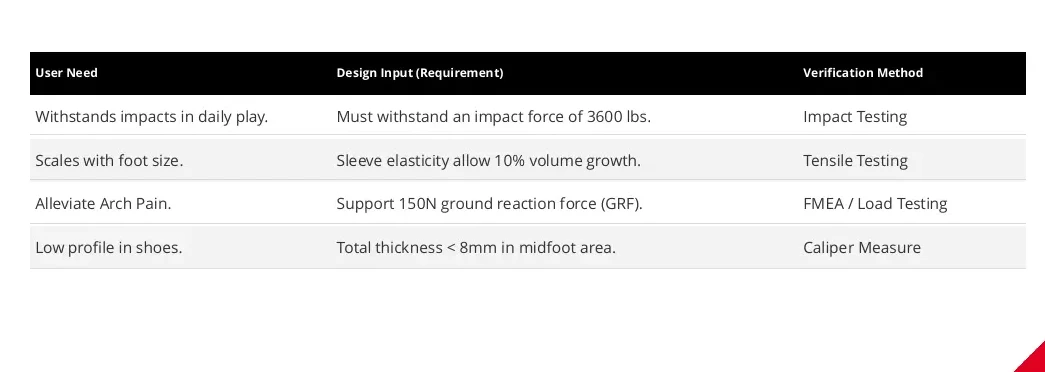
Fig. 2 Four user needs and the test planned for each. Design review, page 5 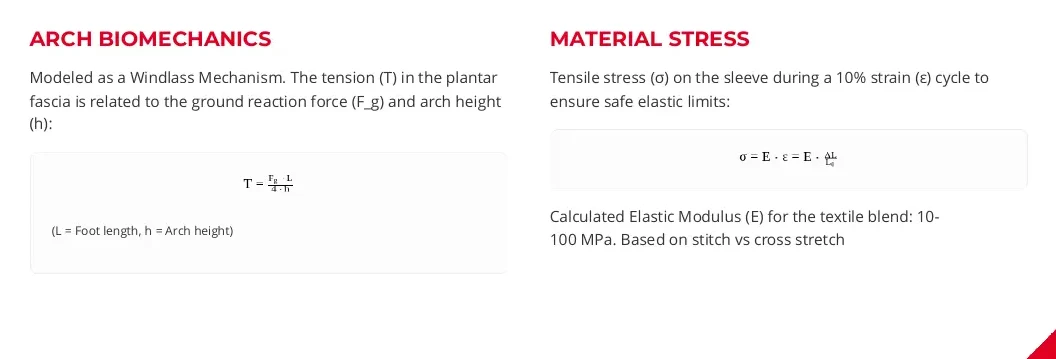
Fig. 3 The arch as a windlass, and sleeve stress at 10% strain. Design review, page 9
How we tested it
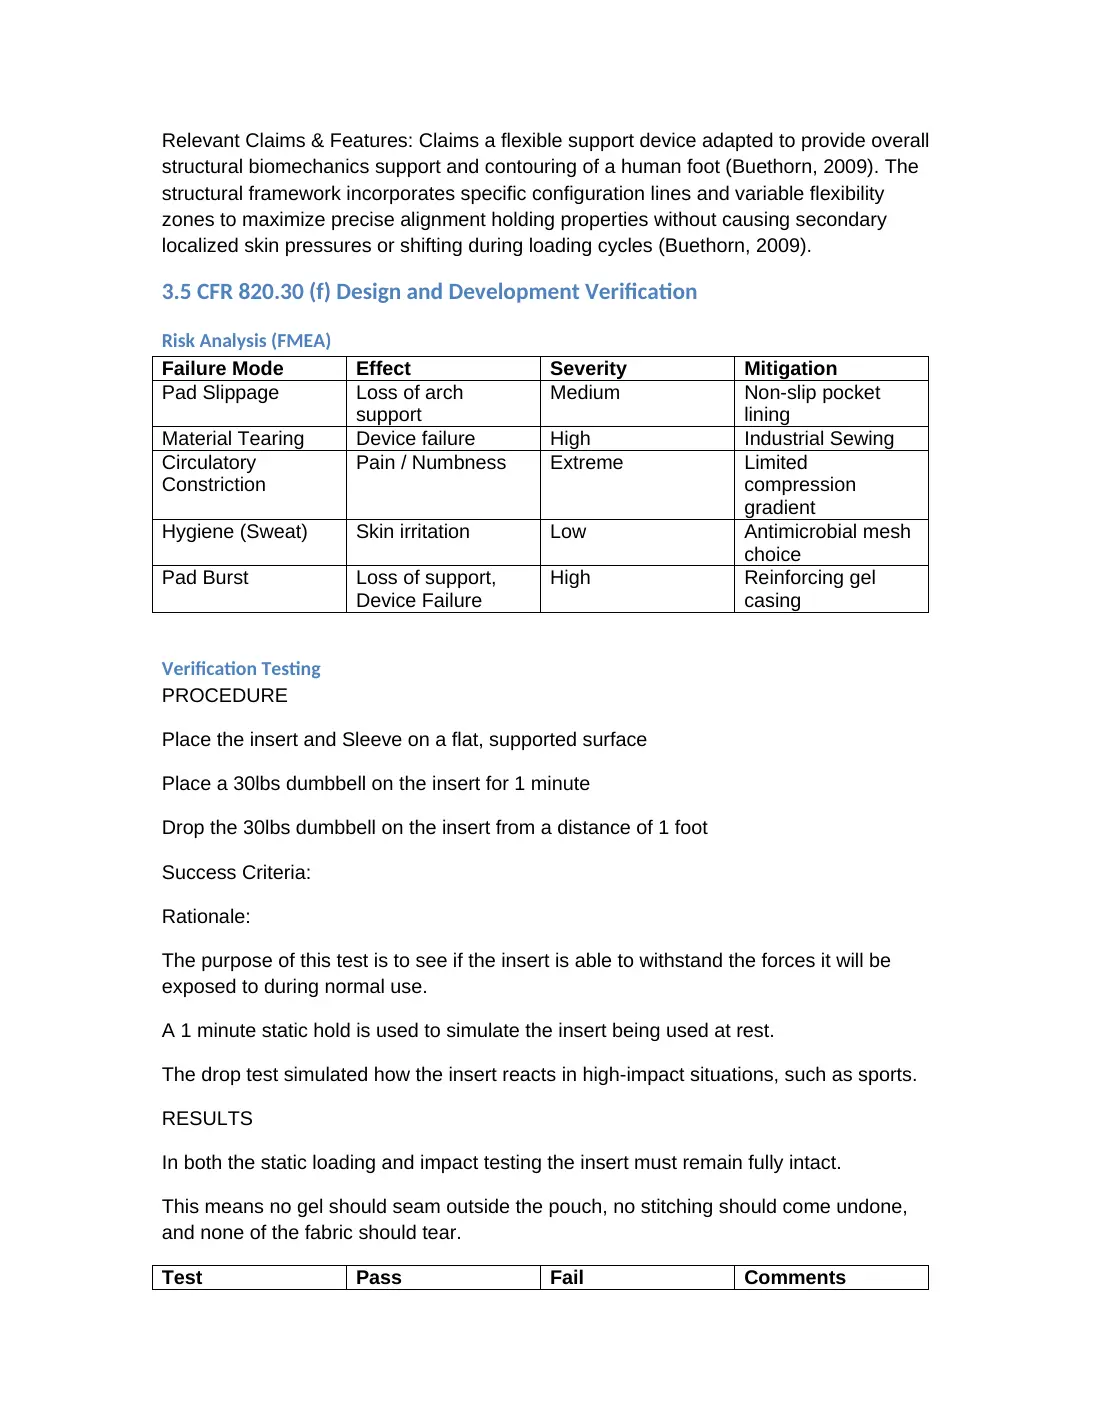
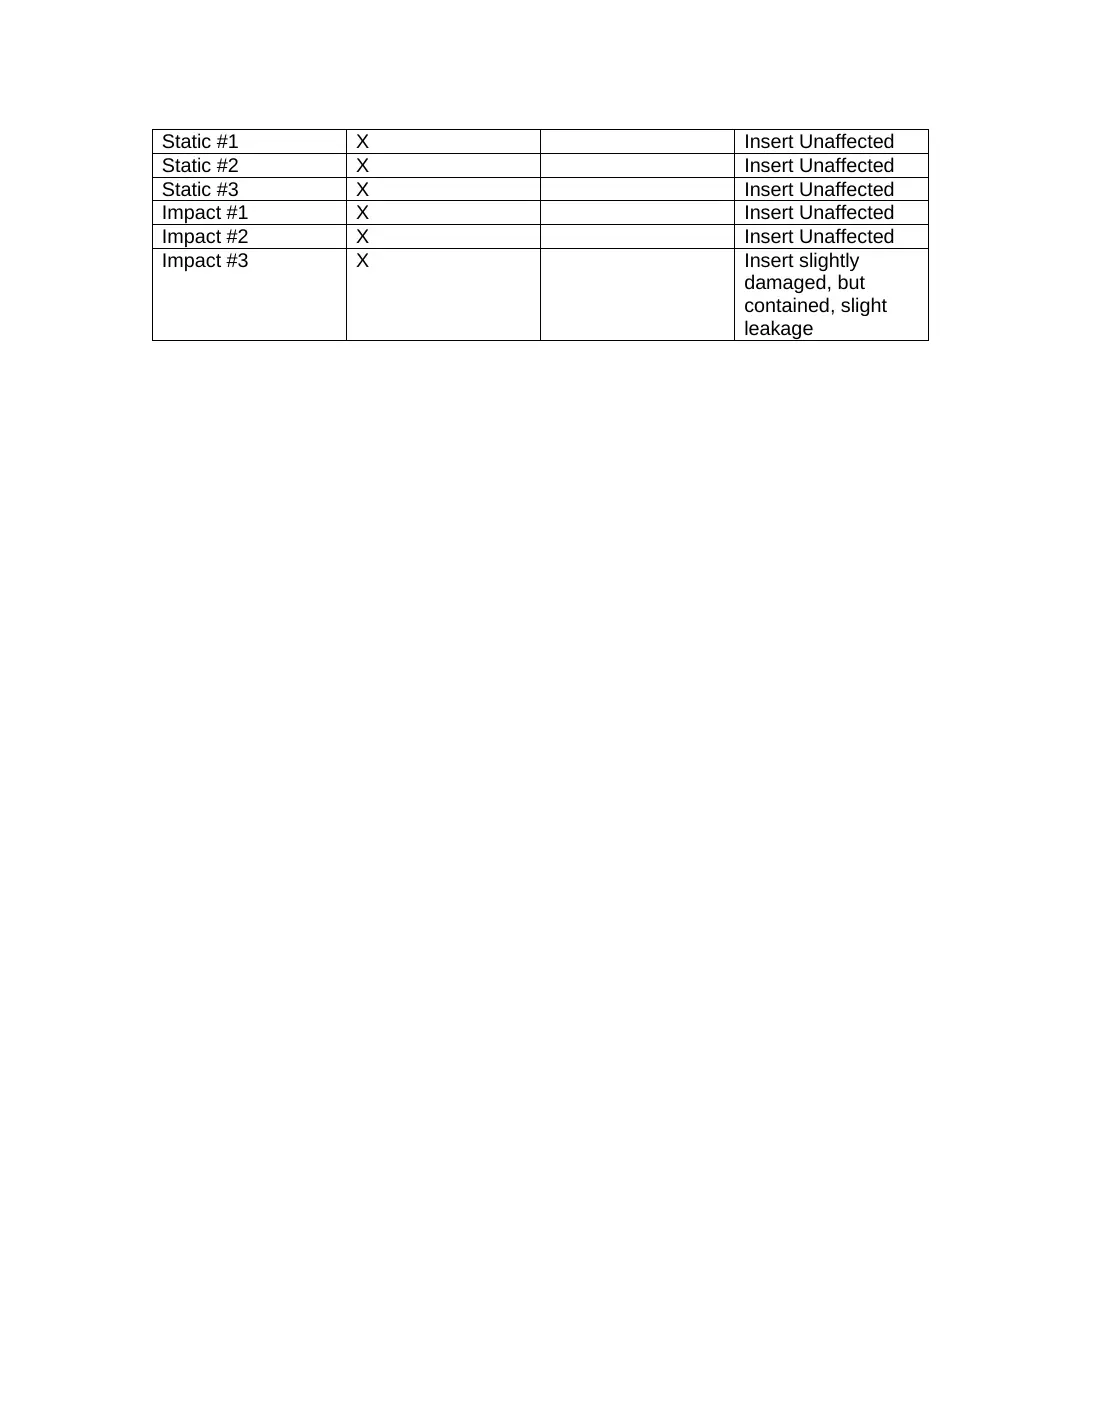
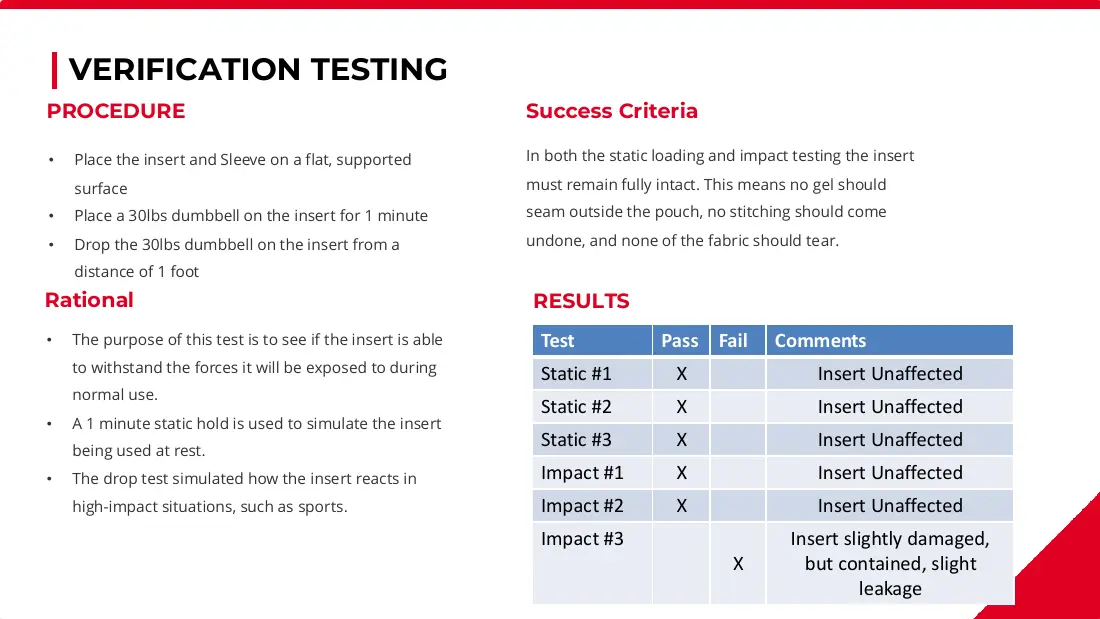
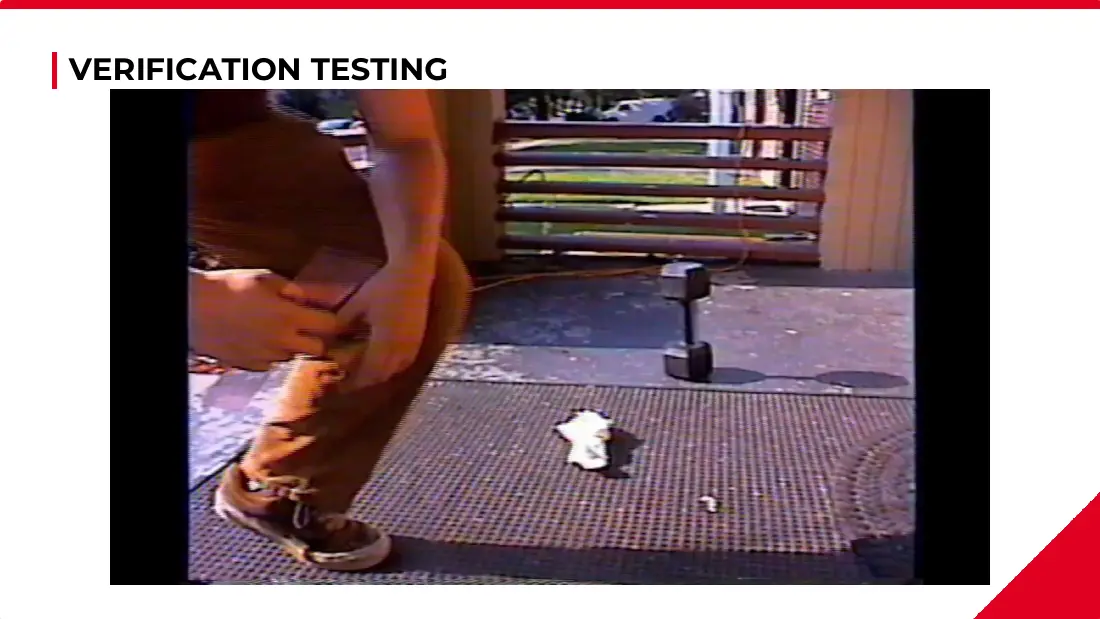
We put a 30 lb dumbbell on the V2 insert: three holds of 1 minute, then three drops from 1 foot. Pass meant the insert stayed fully intact. One prototype went through the bench test.
| Test | Load | Result |
|---|---|---|
| Static hold 1 to 3 | 30 lb, 1 minute | Insert unaffected |
| Drop 1 and 2 | 30 lb, 1 foot | Insert unaffected |
| Drop 3 | 30 lb, 1 foot | Insert slightly damaged, slight leakage |
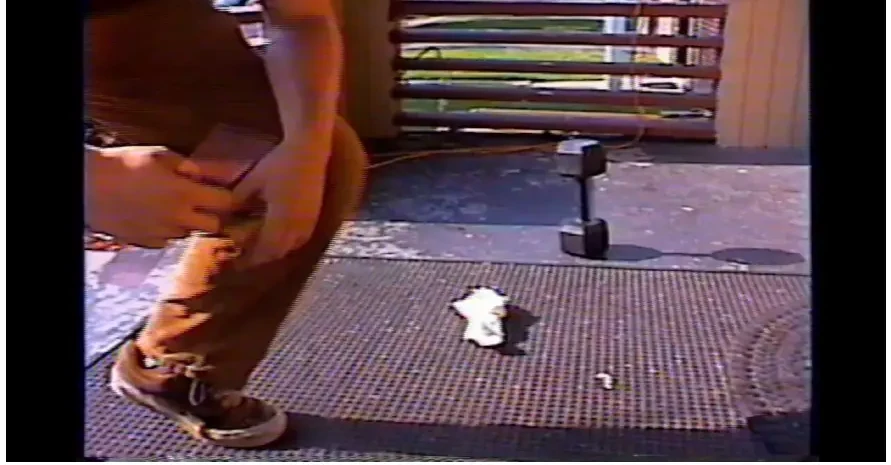
Fig. 4 A frame from the bench test in our report. 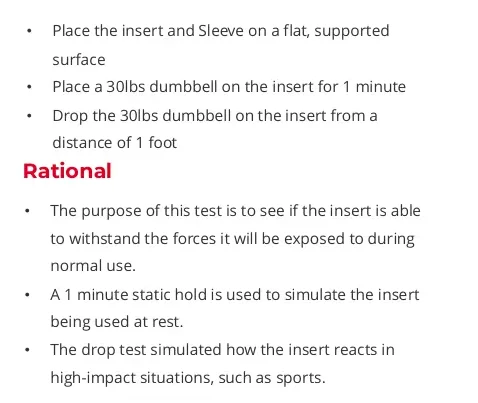
Fig. 5 The procedure as written for the bench test. Design review, page 11
Documents
Three team reports with a note on each key page.
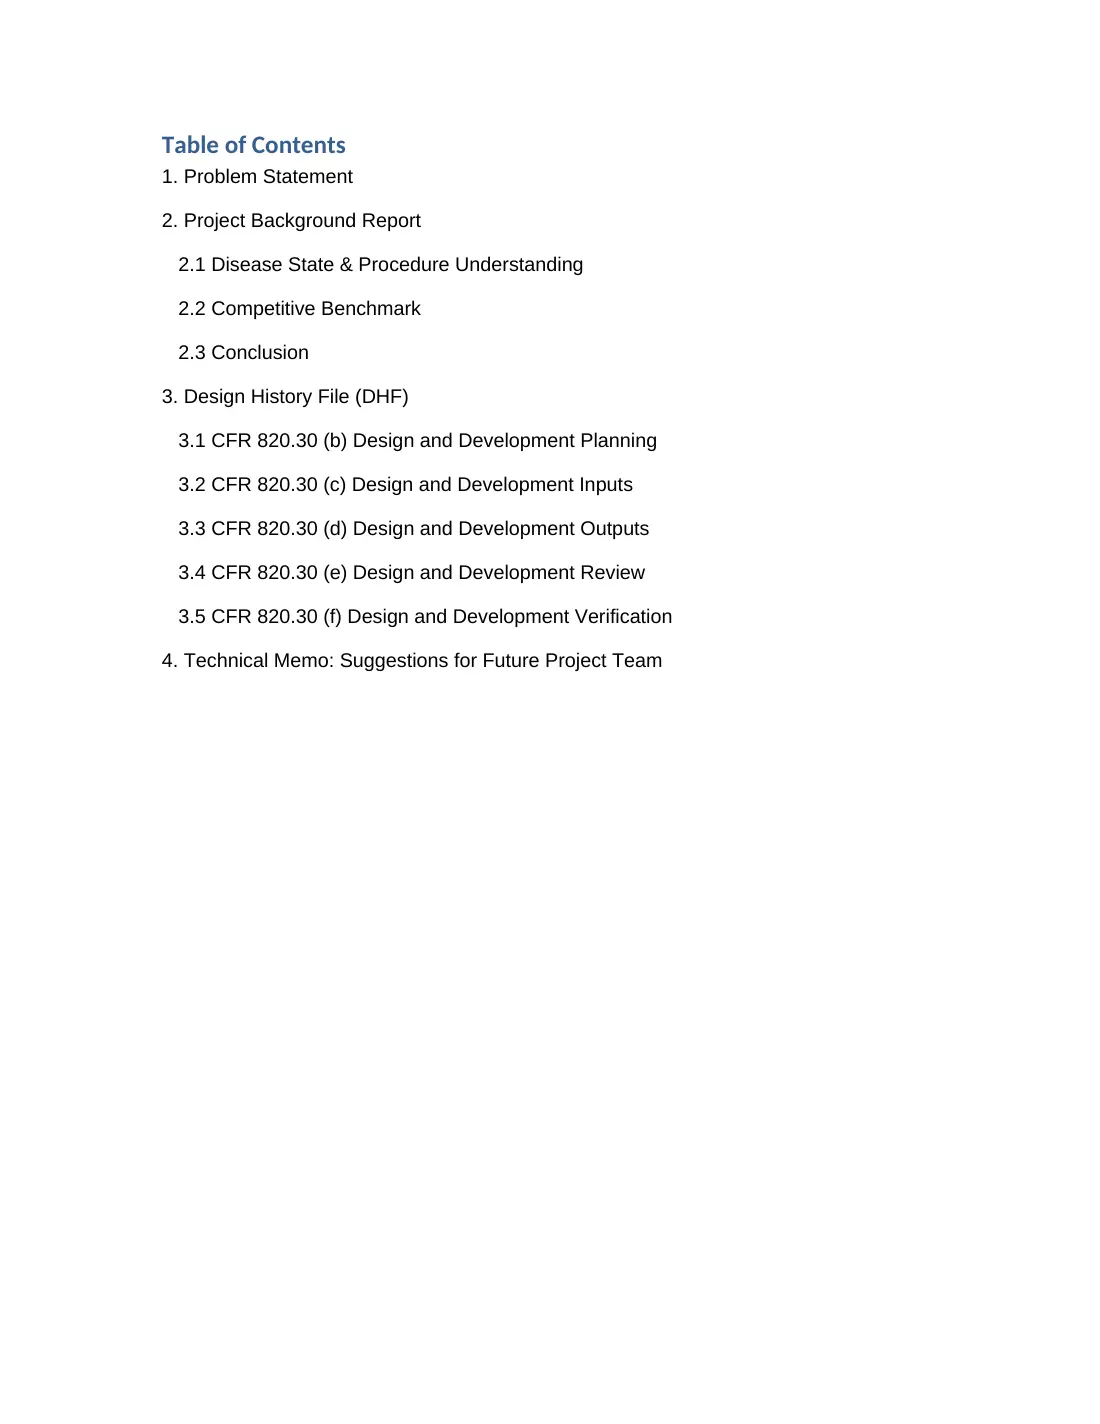
Pediatric arch support: final project documentation
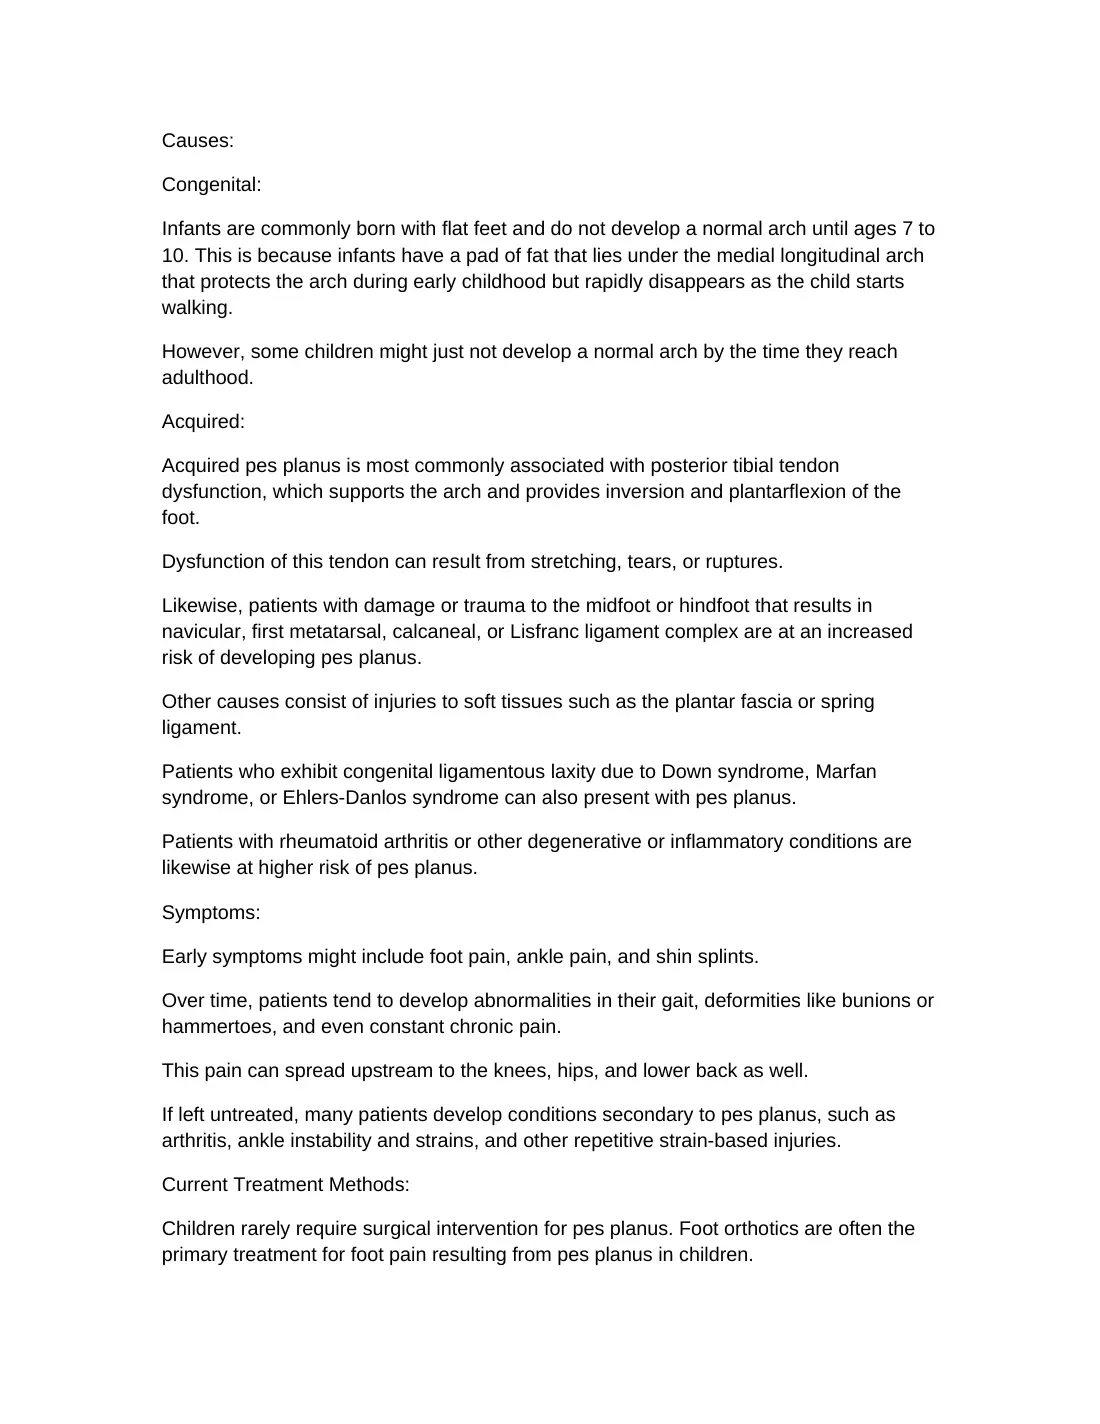
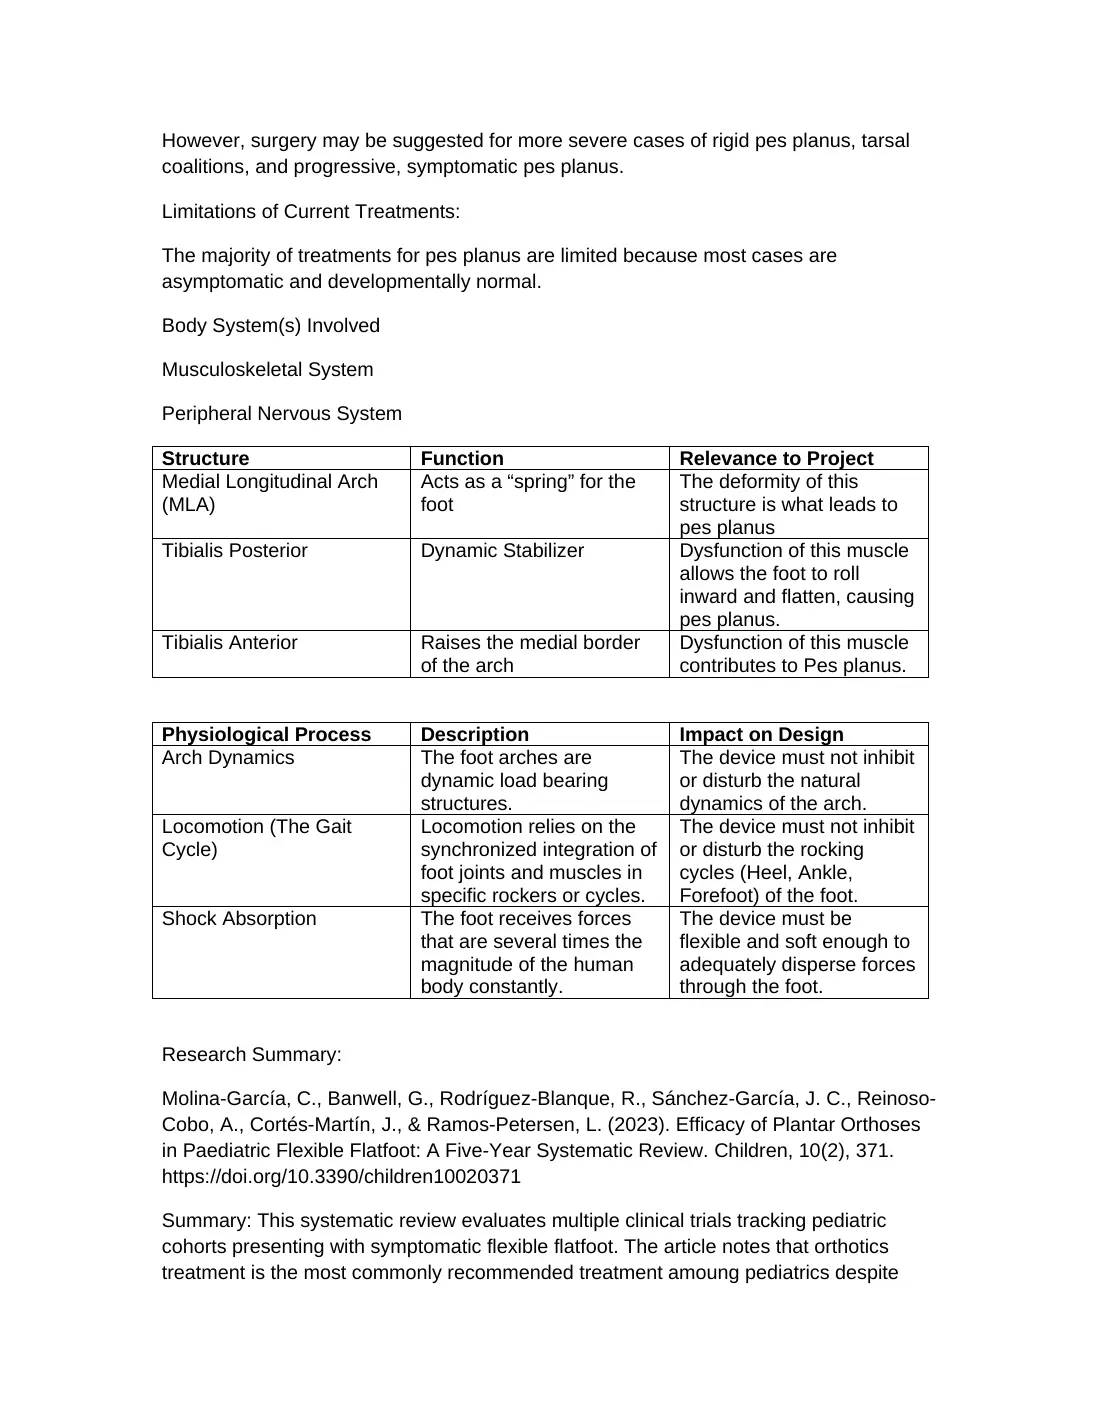
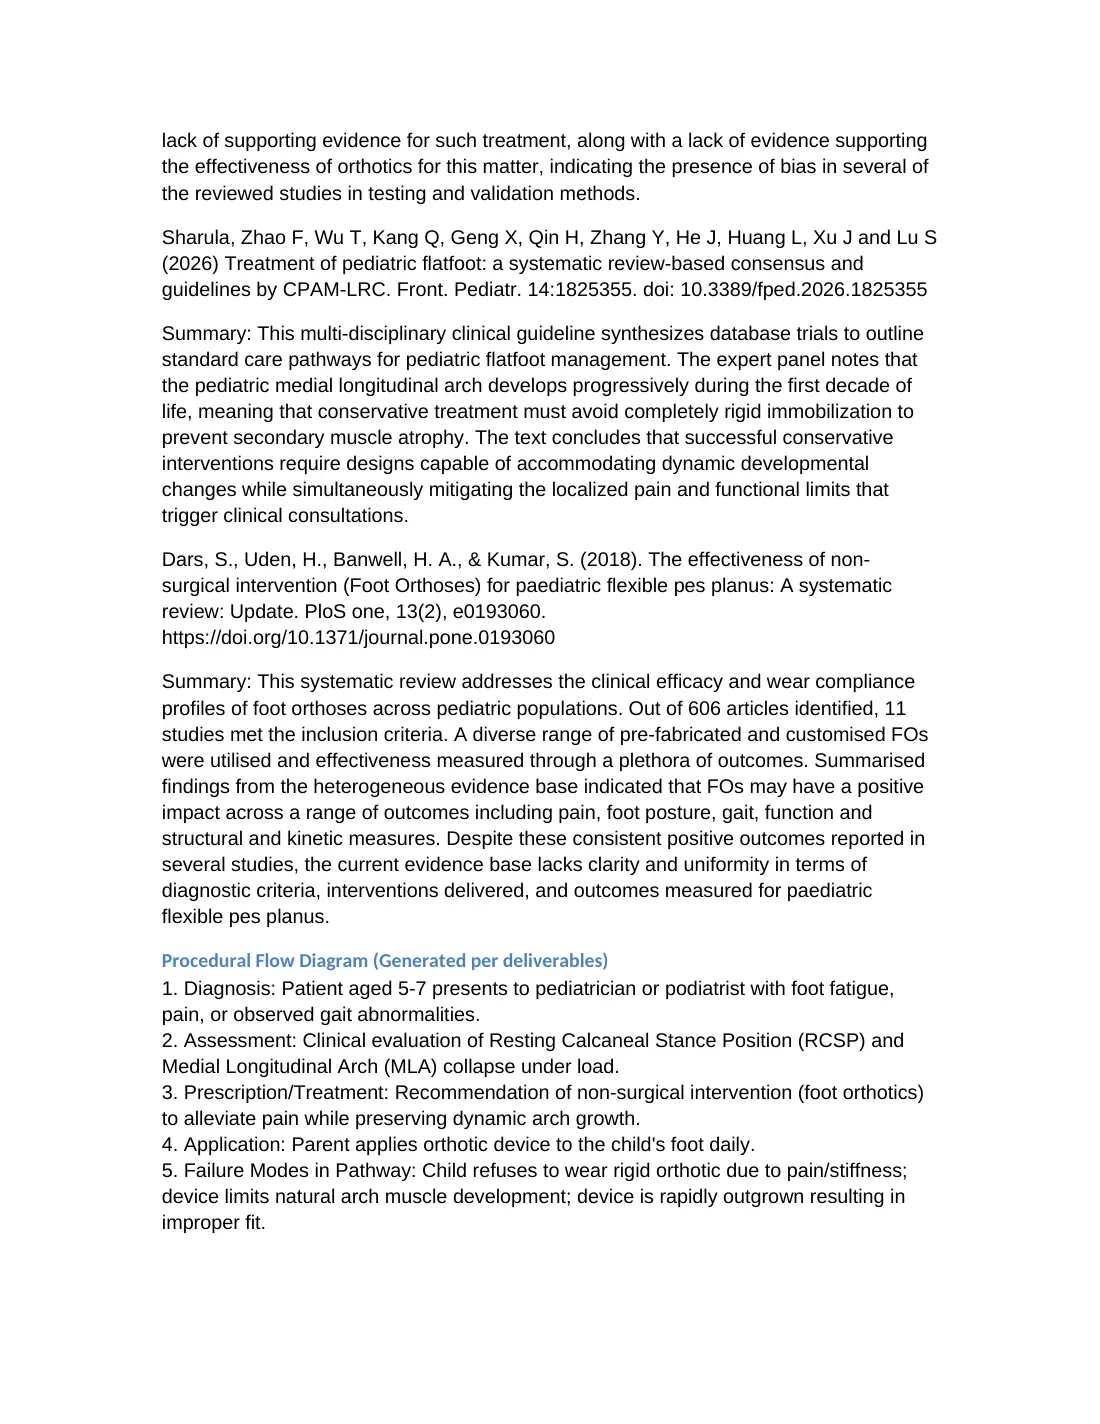
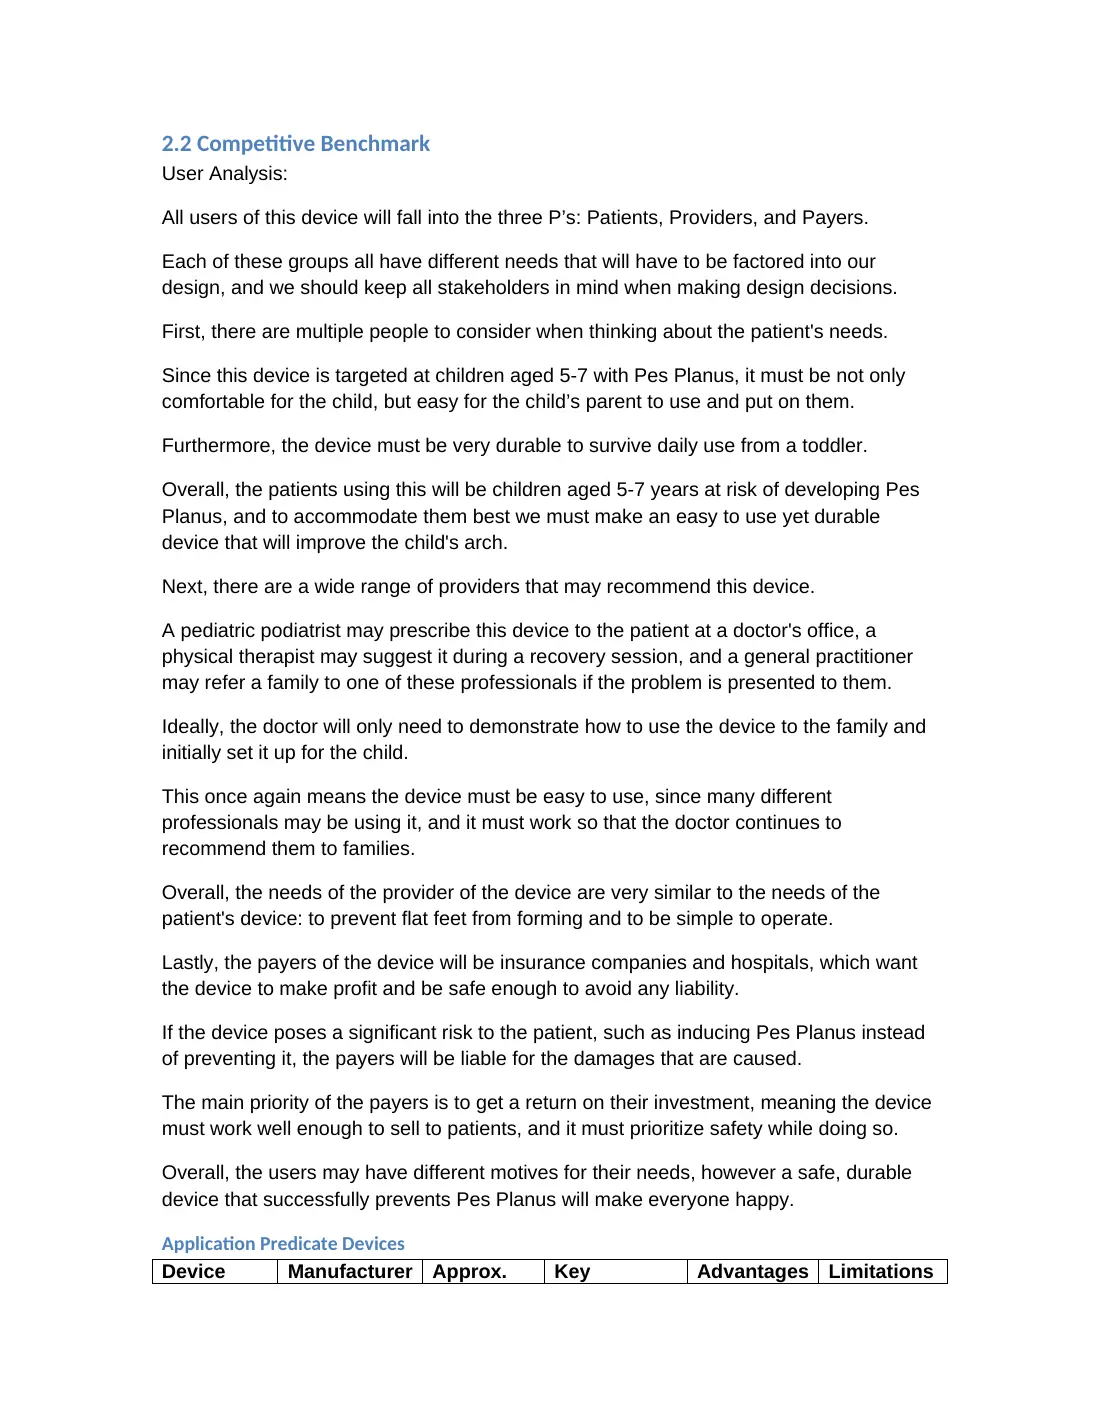
Our 23-page Group 11 report. Page 10 lists contributions; page 16 shows V1 and V2.
11 notes on the guided path.
Zoom in to read the page. Scroll within the page to move around.
Page 1
Page 2
Page 3
Page 4
Page 5
Page 6
Page 7
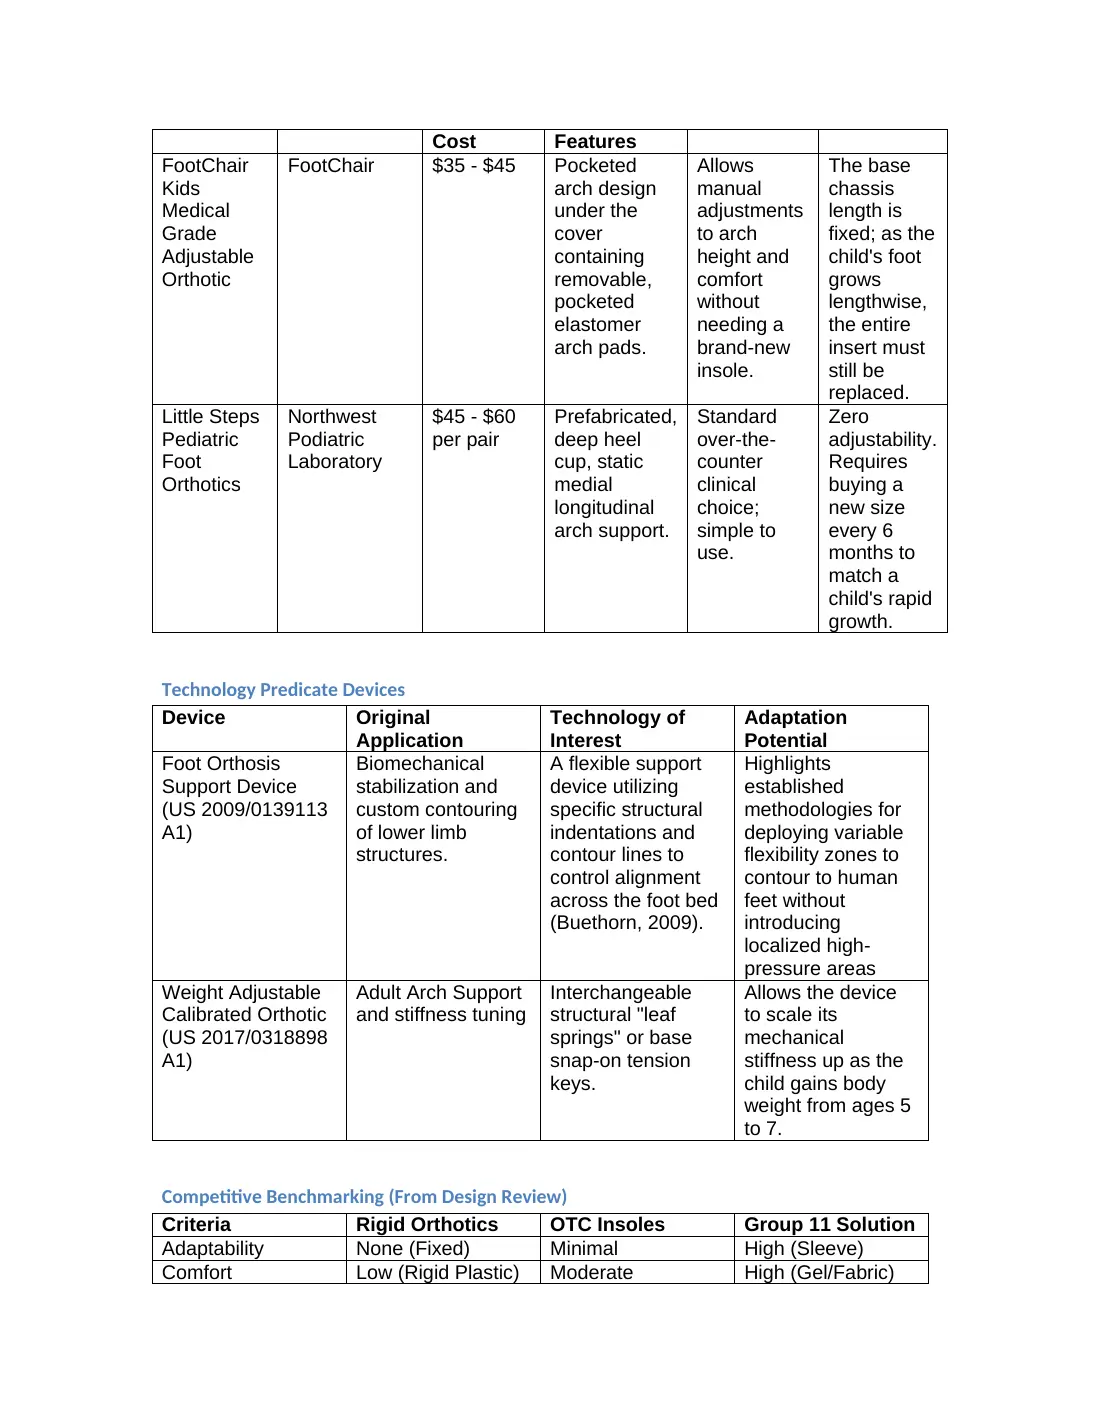
Page 8
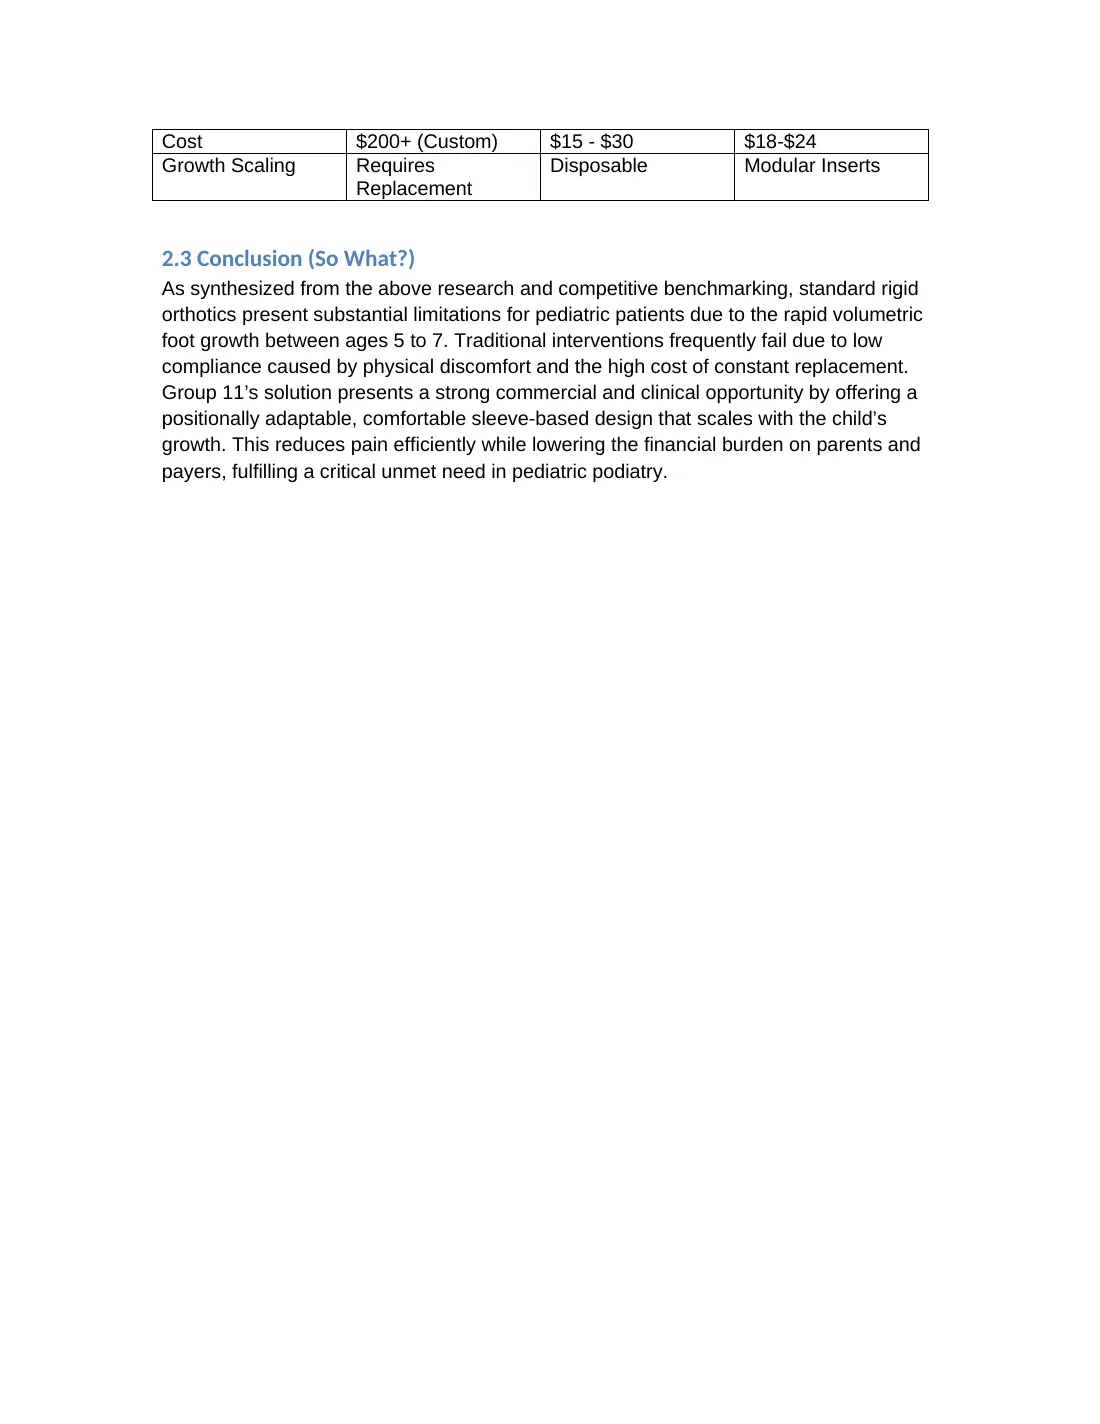
Page 9
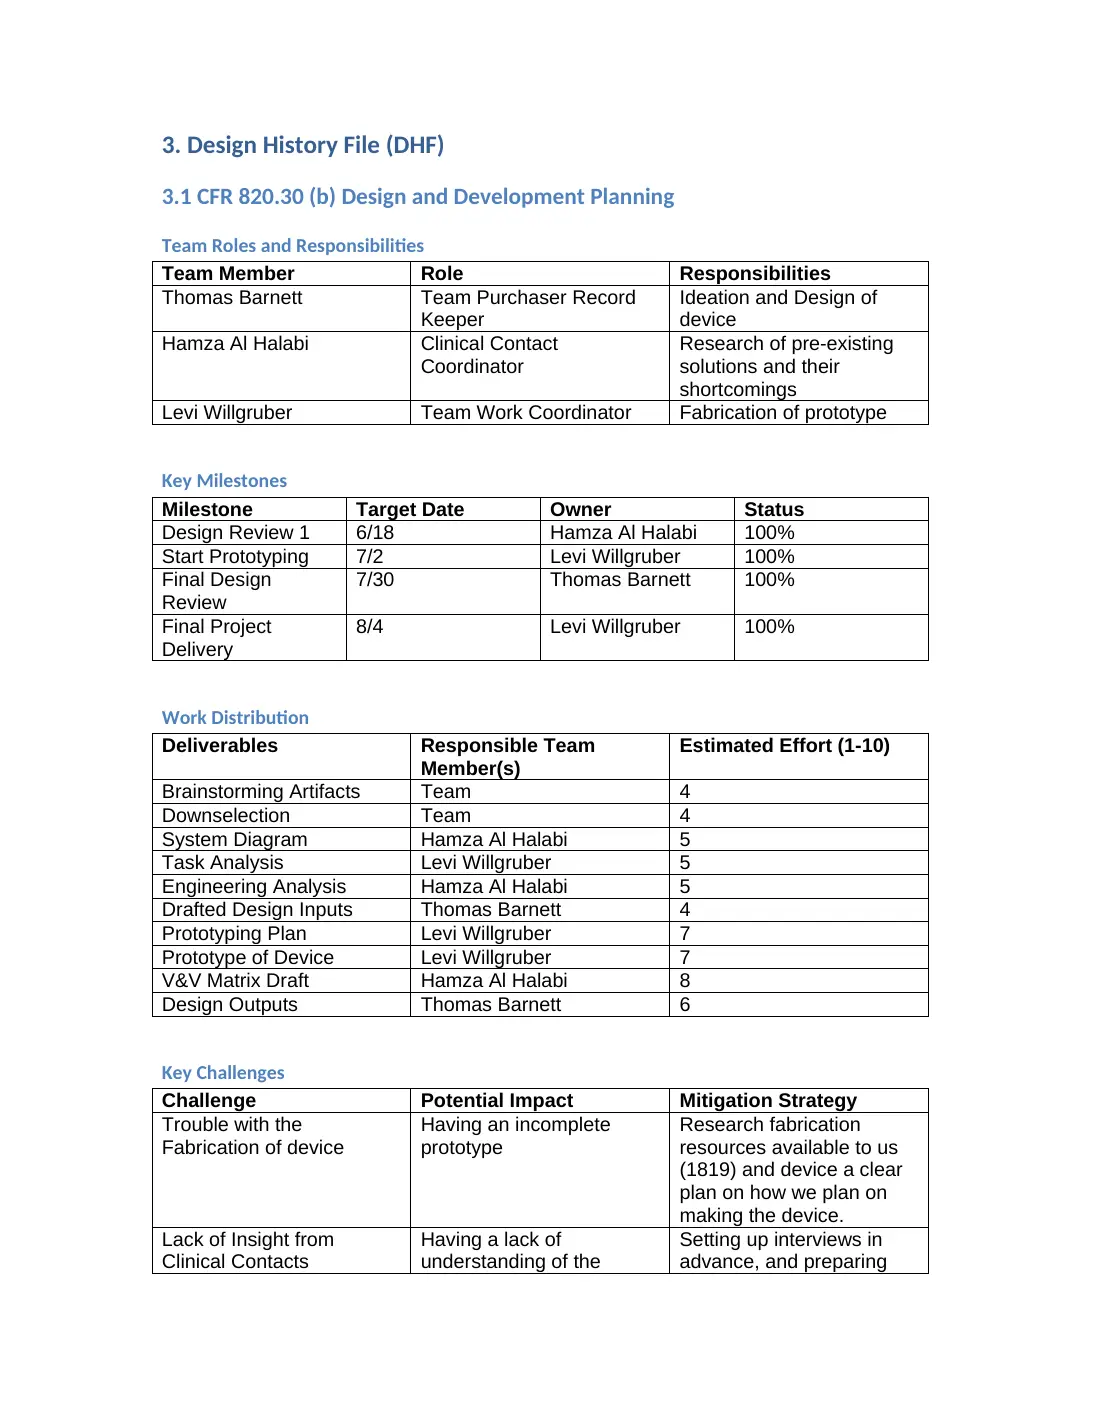
Page 10
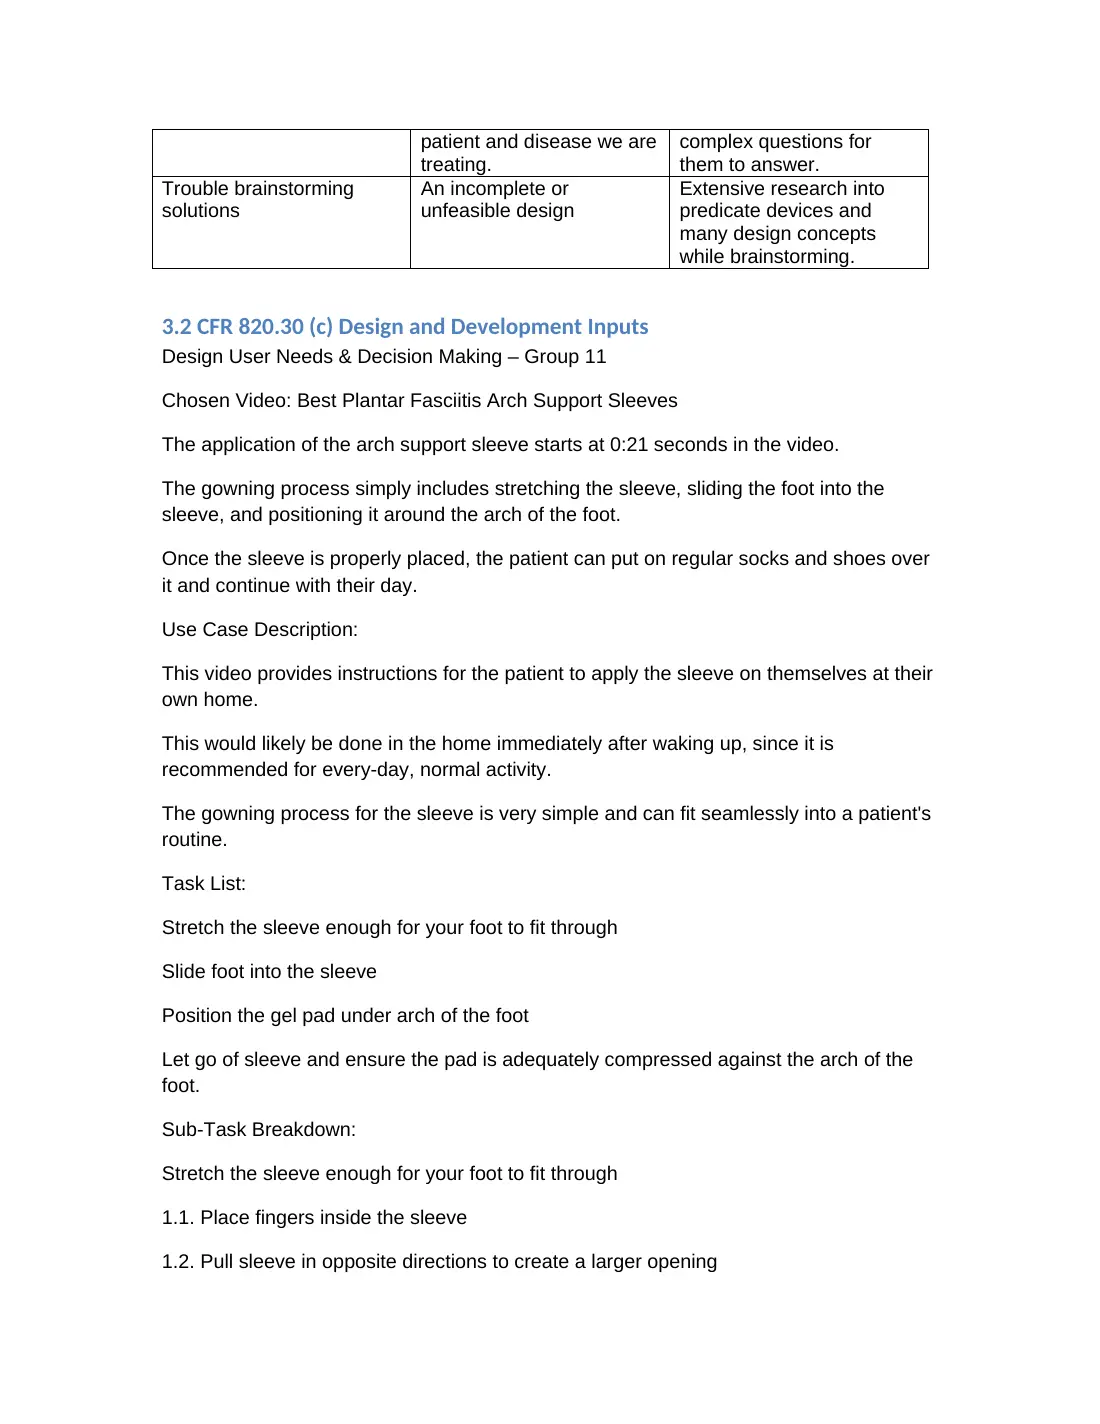
Page 11
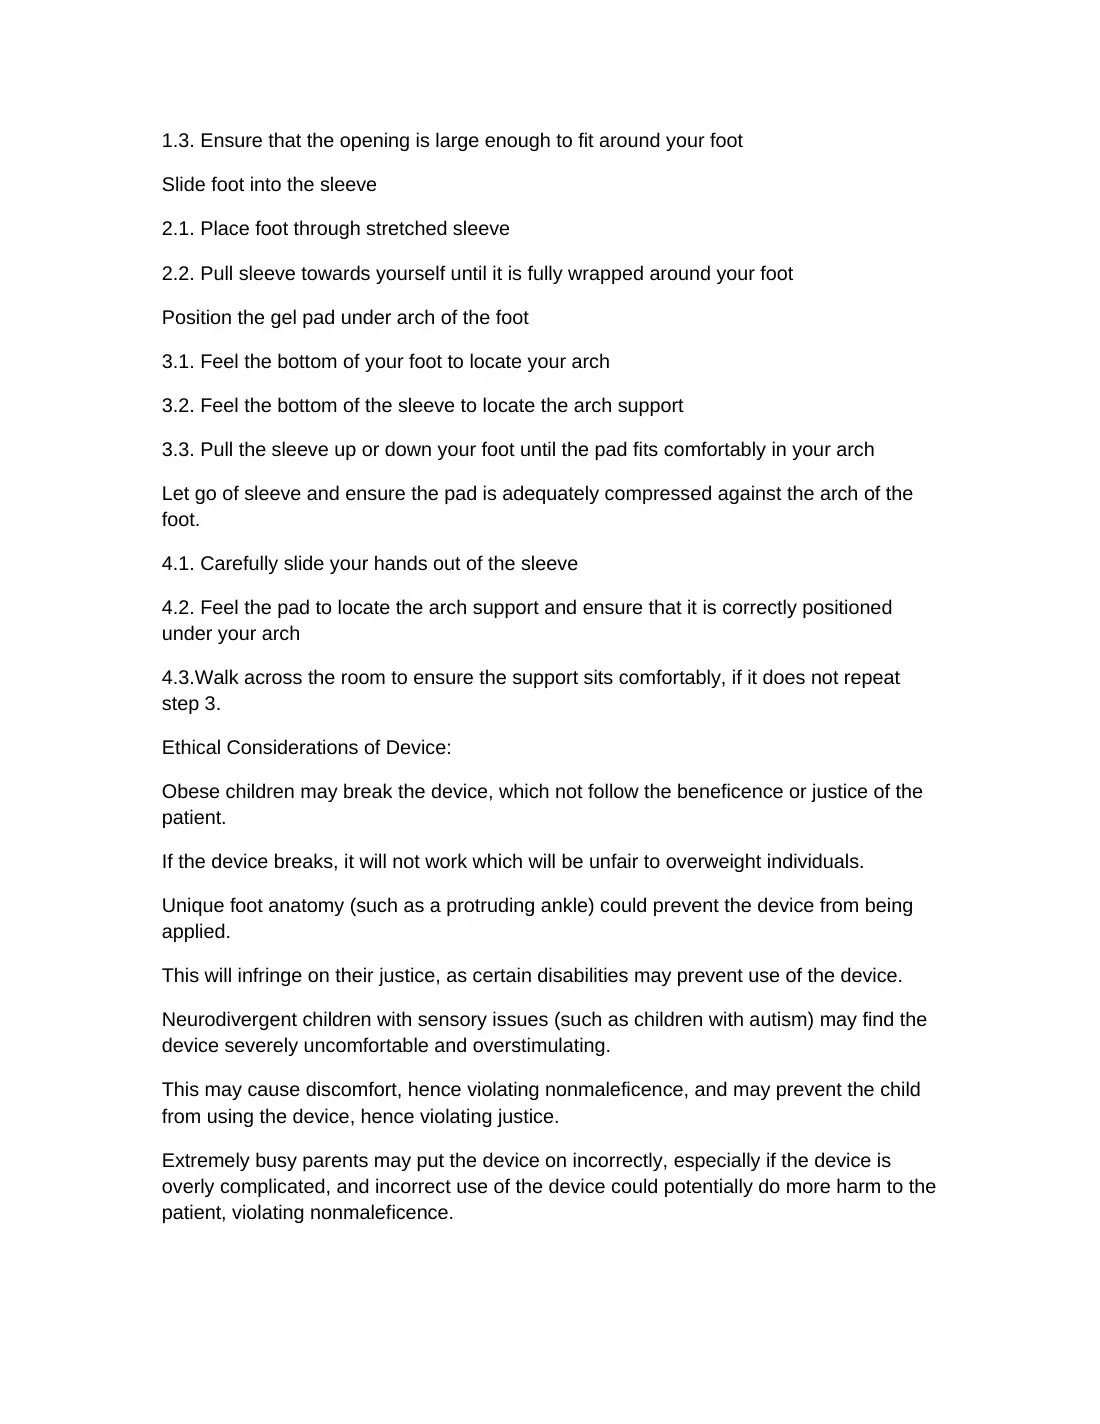
Page 12
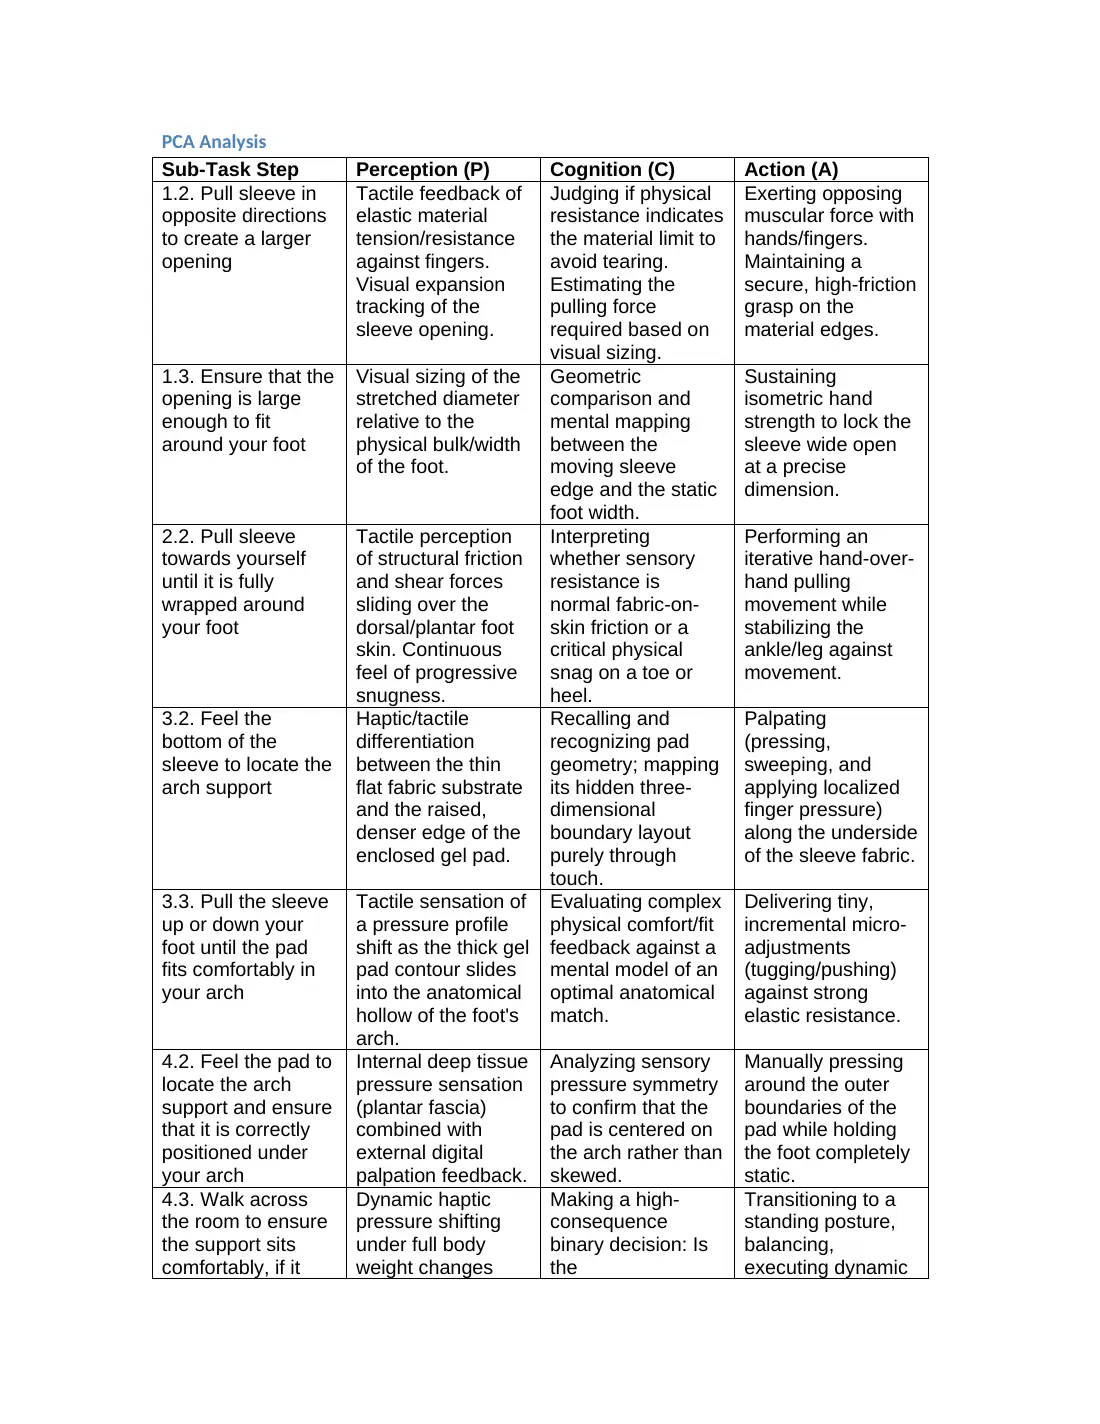
Page 13
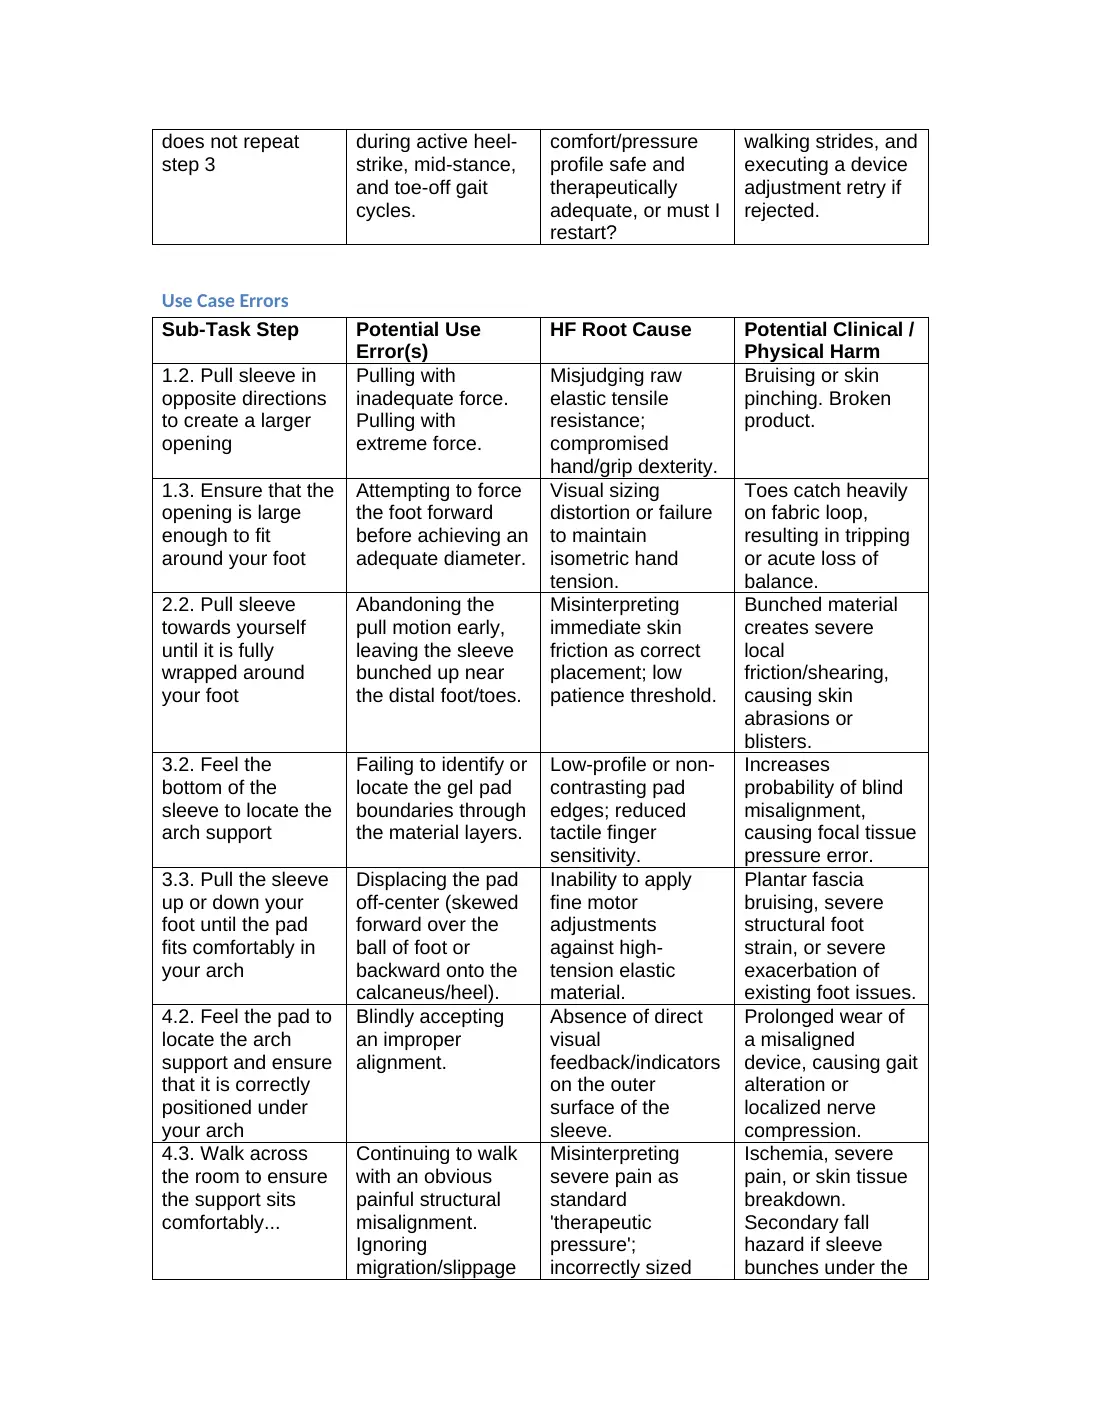
Page 14
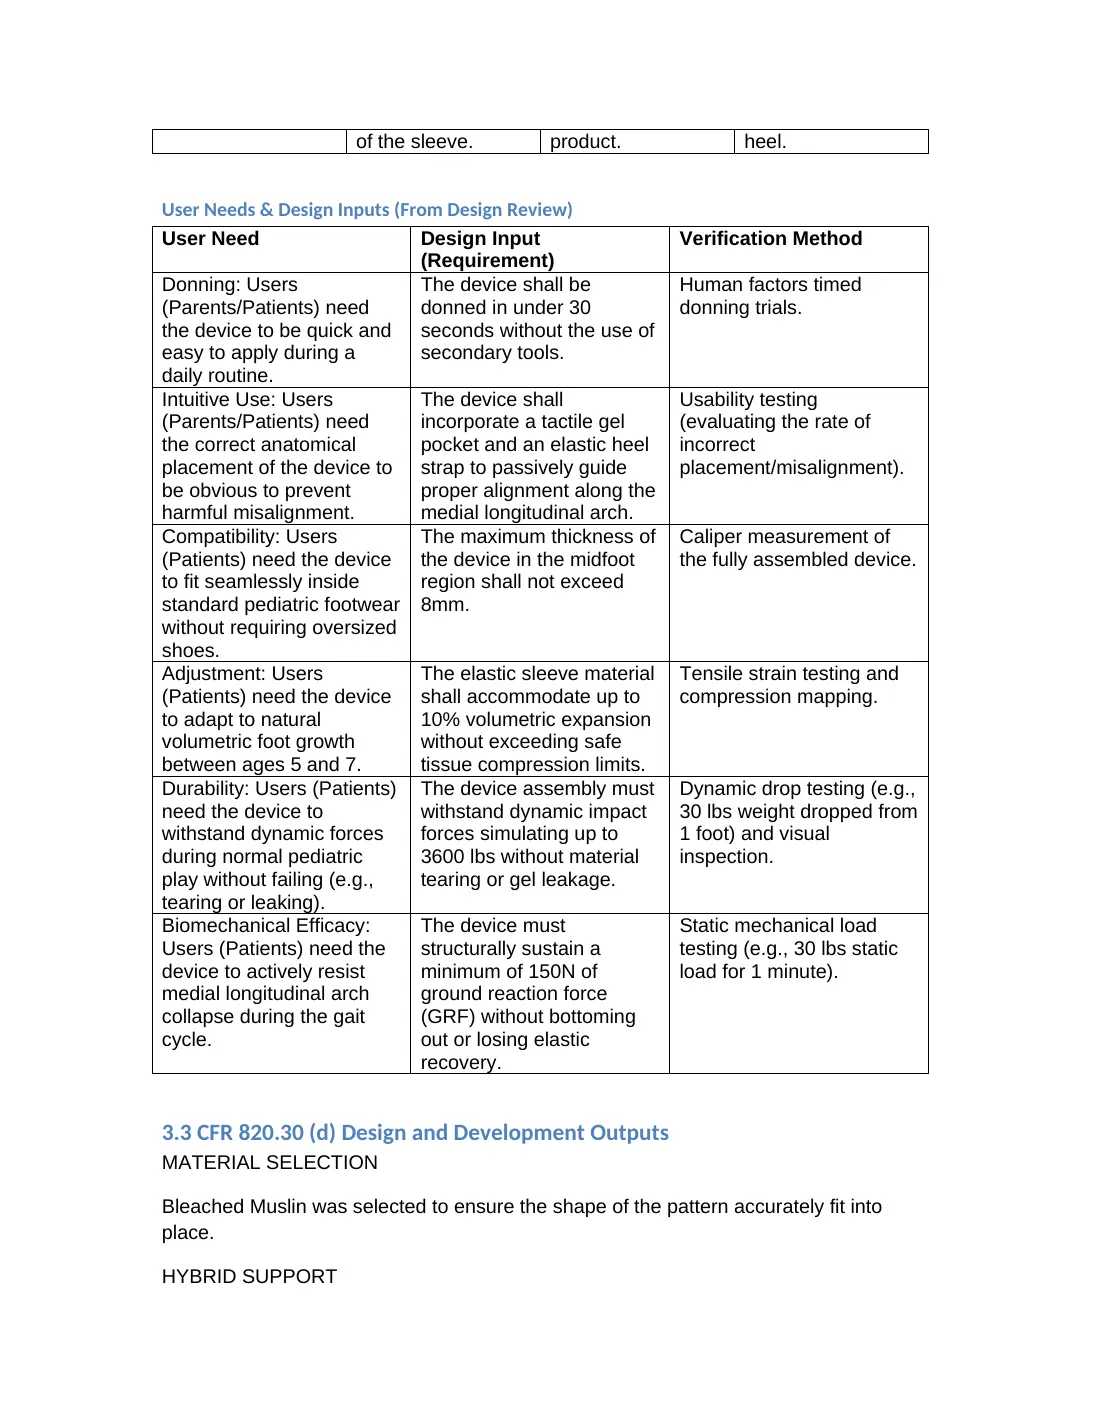
Page 15
Page 16
Page 17

Page 18
Page 19
Page 20
Page 21
Page 22
Page 23
Pediatric arch support: final design review
Our 8 August 2026 design review. Start with the requirements on page 5 and the V2 sleeve on pages 7 and 8.
5 notes on the guided path.
Zoom in to read the page. Scroll within the page to move around.
Page 1
Page 2
Page 3
Page 4
Page 5
Page 6
Page 7
Page 8
Page 9
Page 10
Page 11
Page 12
Page 13

Page 14

Page 15
Pediatric arch support: background review
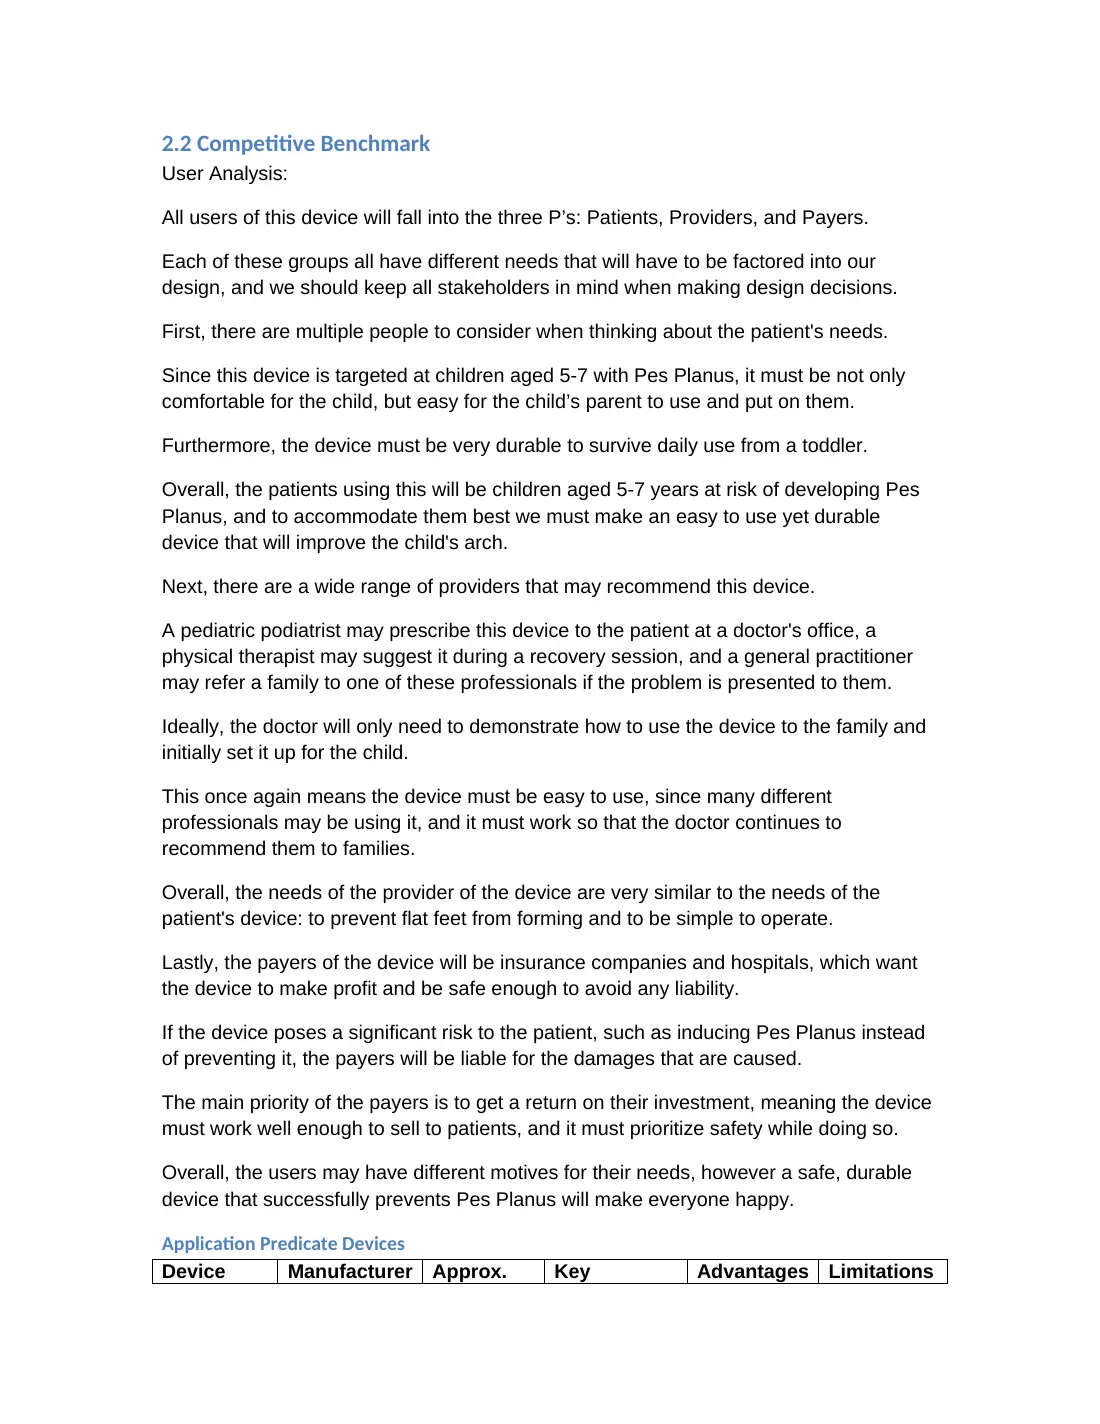
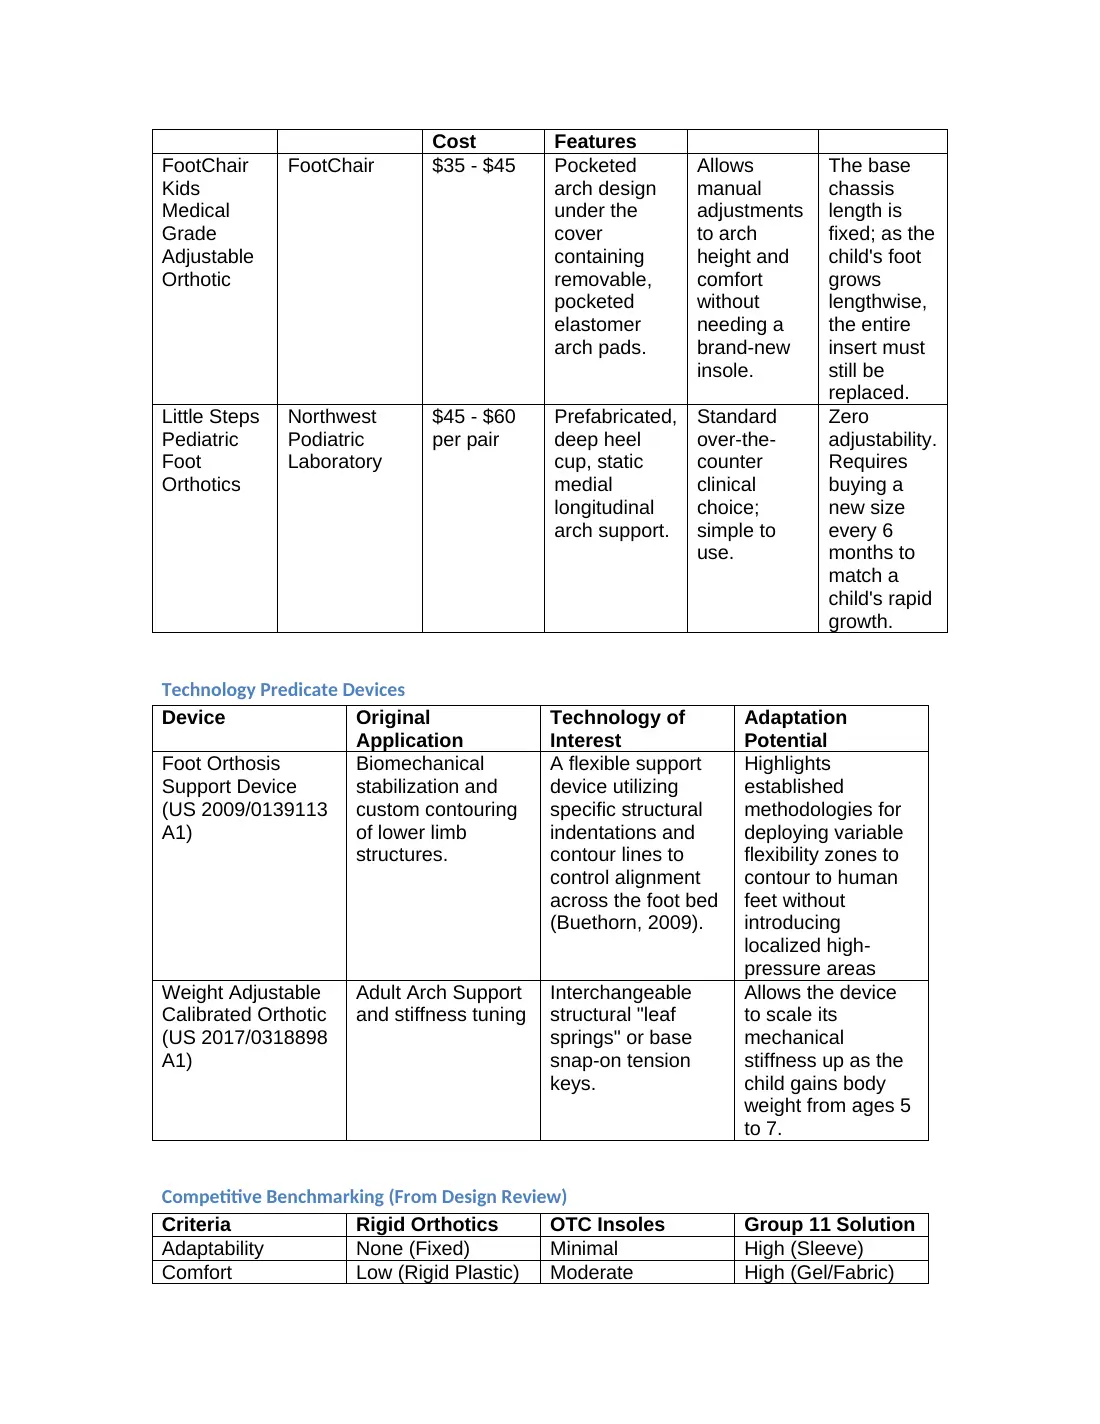
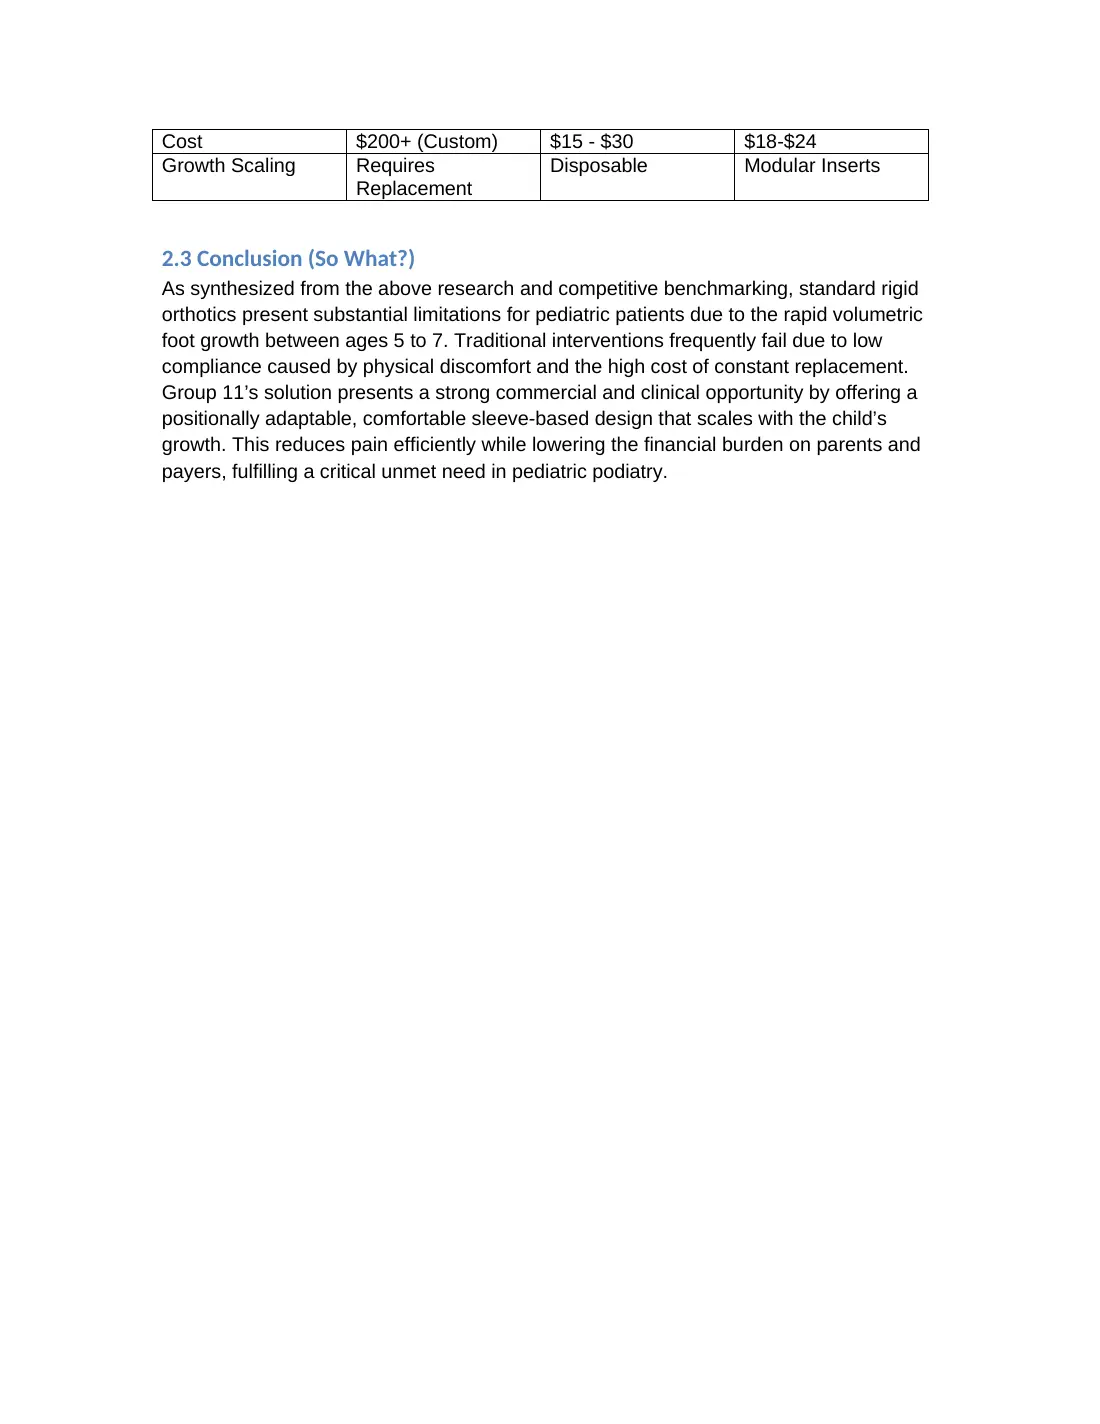
Our seven-page review of flat feet, existing treatments and adjustable-insole requirements.
7 notes on the guided path.
Zoom in to read the page. Scroll within the page to move around.
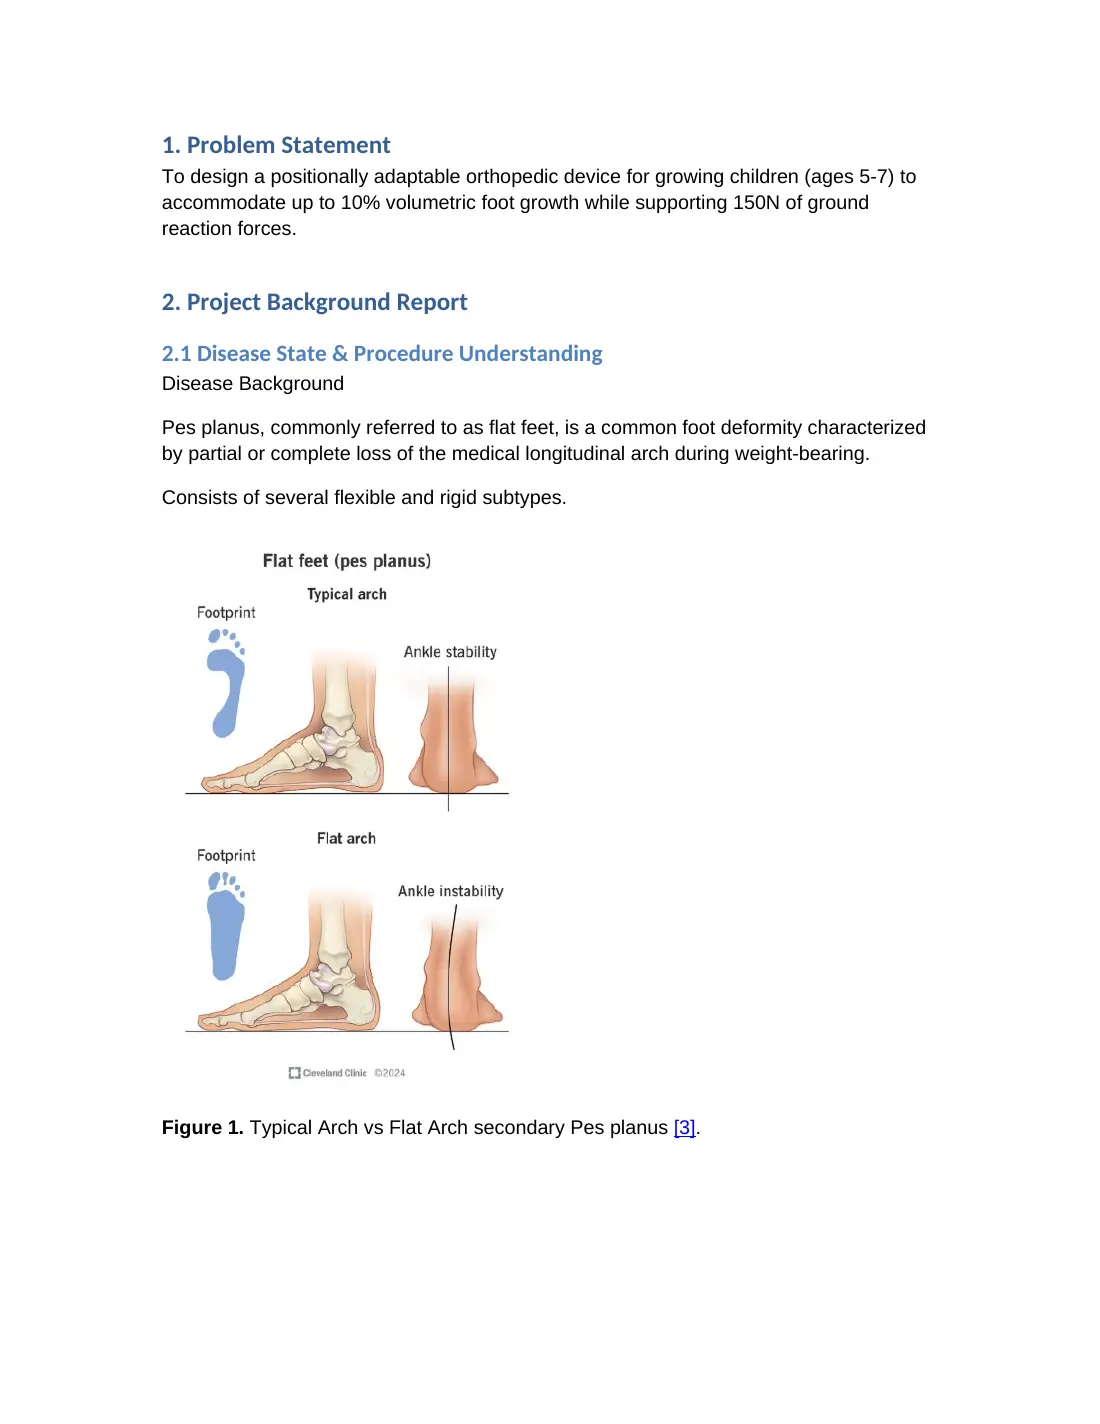
Page 1
Page 2
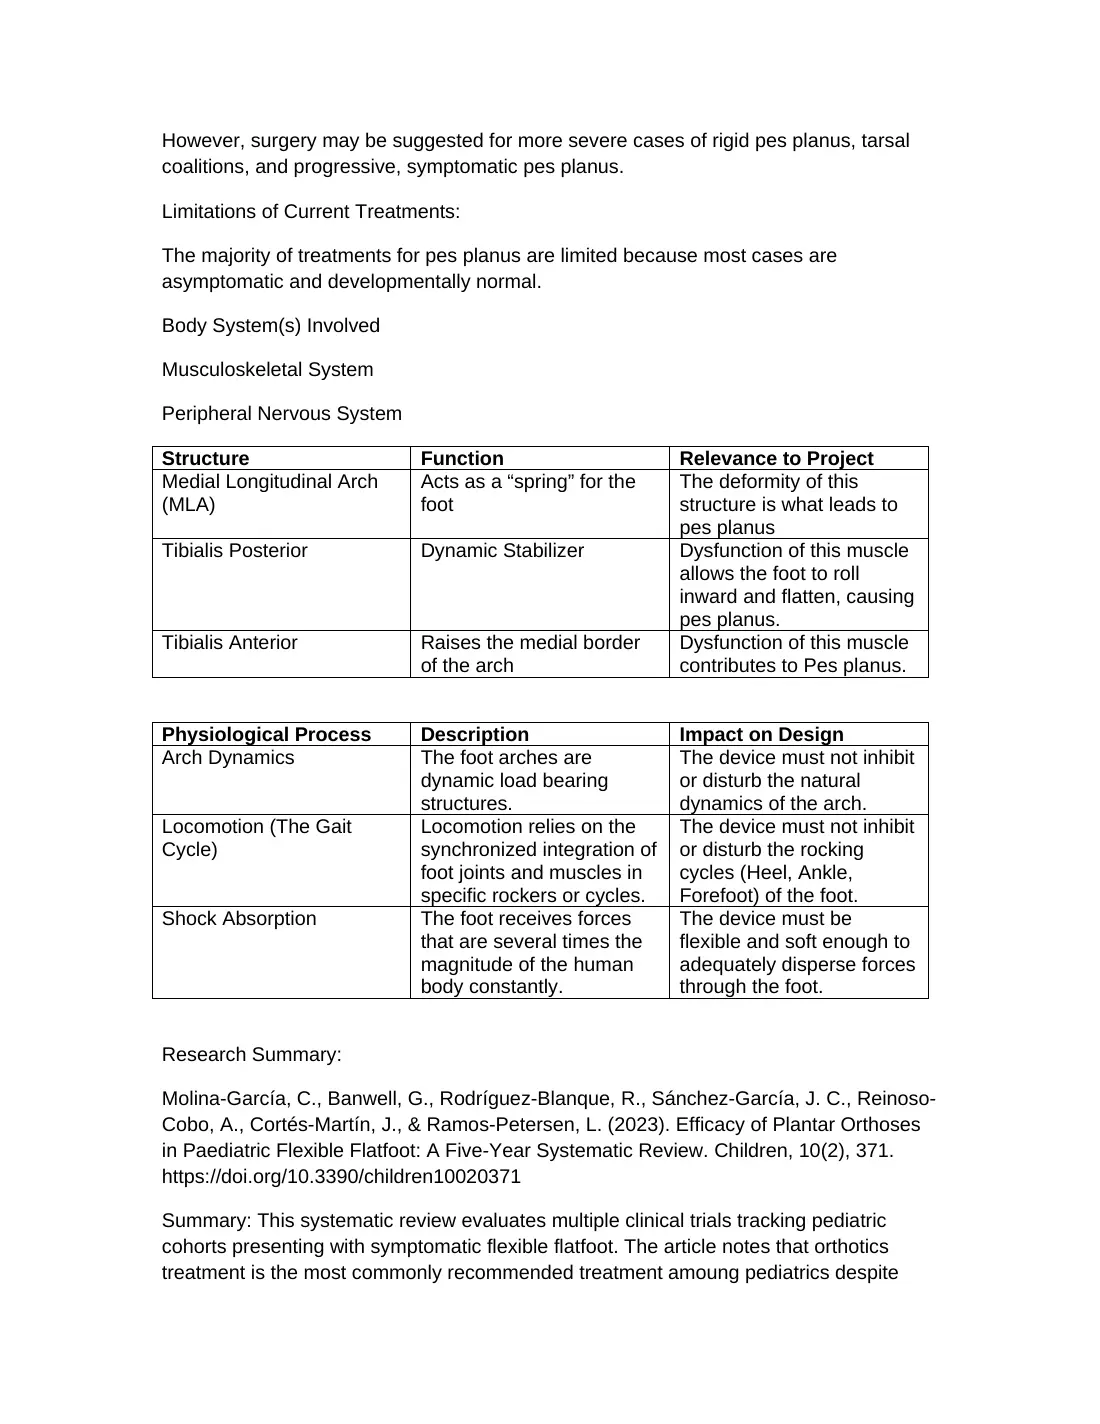
Page 3
Page 4
Page 5
Page 6
Page 7
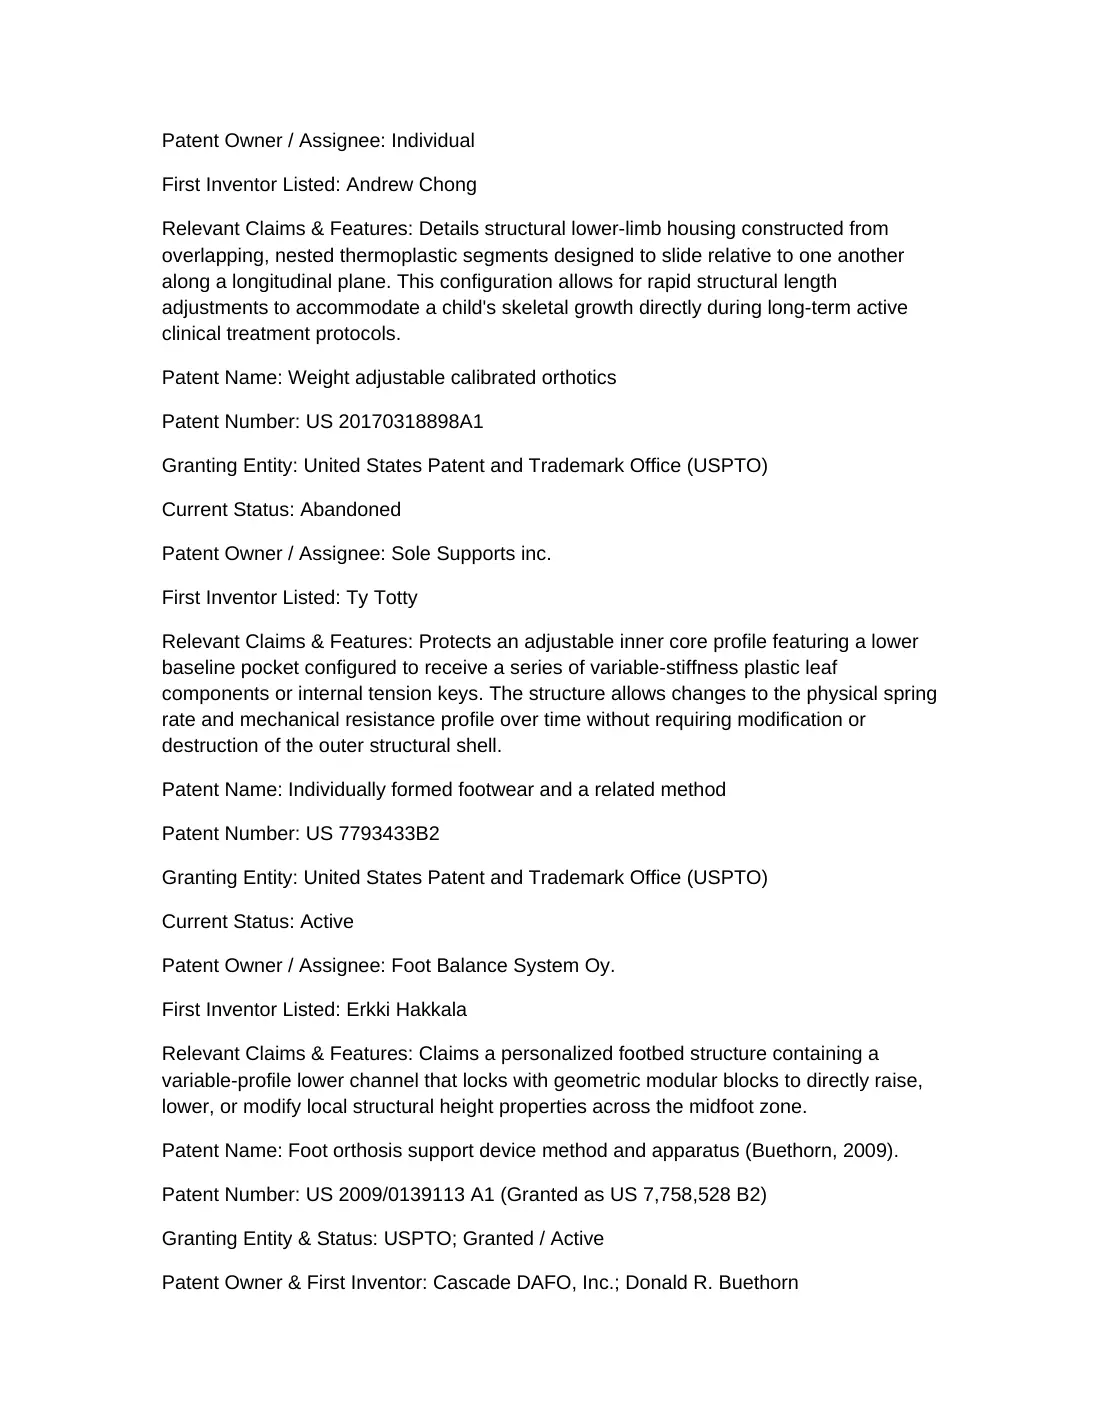
Sources: the evidence ledger and the three reports as PDF: final report, design review, background review.